Hashing It Out: Lookup Performance in Dyalog APL

Sometimes it seems that I have the attention span of a cocker spaniel puppy. I start to look at one thing, and then something pops up to distract me and I follow that until another distraction or tangent comes along and then…. well, you get the point. What started out as one blog post has morphed a few times into what you’re about to read!

Background and Original Goal

In a former life, I wrote an APL-based full-text search engine for searching legislative and regulatory texts. At the time, its speed rivalled any of the online search engines. In that governmental context, words like “the” and “of” have significance, for example, the “the” in “the white house” is significant, as are the “of” and “the” in “speaker of the house”. Most search engines would ignore those high-frequency “noise” words – mine couldn’t. My goal was to be able to search for such phrases without having to examine the data for the high-frequency words. I found this to be an interesting problem at the time (in the 1990s) and subsequently included it 25 years later as the 2015 APL Problem Solving Competition Phase 2 Applications Problem 2. My original idea for this blog post was to examine approaches to that problem.

The core of the problem was straightforward – you have a list of words (vector of character vectors) and a corresponding vector of frequencies for each word. We’ll call these two vectors Words and Freqs. For those interested, the source data I used for my recent effort came from a repository that tracks Wikipedia word frequencies. The task is to, for a given phrase, break the phrase up into individual words (we’ll call this words), look up words in Words, and use the indices to extract their frequencies from Freqs. This is basic APL, the sort of thing we do all the time: Freqs[Words ⍳ words]. If we want to consider the case where a word in words isn’t found in Words, we can append 0 to Freqs.

The source for Words and Freqs has 2,765,377 words. To emulate my original work done in the 1990s when we were using only ASCII characters, I decided to remove words containing non-ASCII characters. As a result, we’re left with 1,905,526 words.

Tangent #1 – ⎕CSV

If you’re interested in obtaining Words and Freqs yourself, you can download the raw data file and use ⎕CSV and a bit of code:

      (Words Freqs)←⎕CSV⍠('Separator' ' ')('Invert' 2)⊢'{your-path-here}/enwiki-2023-04-13.txt' ''(1 2)
      (Words Freqs)/⍨←⊂Words(∧/∊)¨⊂⎕C⎕A ⍝ limit words to ASCII alphabetics

⎕CSV can do some amazing things. Adám Brudzewsky made a very interesting video on Parsing content from text files using ⎕CSV.

From that list, the five most and least frequent words are:

      ⍉↑5(↑,-⍛↑)¨Words Freqs ⍝ look mom! I used ⍛ (behind)!
 the          186631452
 of            88349543
 in            76718795
 and           76039670
 a             54631147
 byodoinji            3
 houryuuji            3
 groendorpen          3
 witotoanas           3
 kimely               3

Interestingly, it seems a word must occur at least 3 times in Wikipedia to make it into this list. Okay, enough background information…

Distraction #1

In my testing, I found that, when words exceeded 3 elements, things slowed down a lot. For example:

      ]RunTime -c "Words⍳'the' 'big' 'dog'" "Words⍳'the' 'big' 'fuzzy' 'dog'"
  Words⍳'the' 'big' 'dog'         → 1.3E¯4 |       0%                                          
* Words⍳'the' 'big' 'fuzzy' 'dog' → 2.5E¯1 | +202400% ⎕⎕⎕⎕⎕⎕⎕⎕⎕⎕⎕⎕⎕⎕⎕⎕⎕⎕⎕⎕⎕⎕⎕⎕⎕⎕⎕⎕⎕⎕⎕⎕⎕⎕⎕⎕⎕⎕⎕⎕ 

One would expect the performance to degrade linearly with the number of words. This appears to be true until you reach 4 elements in the right argument. Let’s create some test cases using lists of 1 to 6 words; since ‘the’ is the first word in the list, these searches should be as fast as possible.

      (p1 p2 p3 p4 p5 p6)←1 2 3 4 5 6⍴¨⊂'the'

Now let’s see what happens when we search for lists of 1 to 4 words:

      ]RunTime -c Words⍳p1 Words⍳p2 Words⍳p3 Words⍳p4
  Words⍳p1 → 2.1E¯2 |     0% ⎕⎕⎕                                      
* Words⍳p2 → 4.2E¯2 |  +102% ⎕⎕⎕⎕⎕⎕                                   
* Words⍳p3 → 6.2E¯2 |  +204% ⎕⎕⎕⎕⎕⎕⎕⎕⎕⎕                               
* Words⍳p4 → 2.6E¯1 | +1147% ⎕⎕⎕⎕⎕⎕⎕⎕⎕⎕⎕⎕⎕⎕⎕⎕⎕⎕⎕⎕⎕⎕⎕⎕⎕⎕⎕⎕⎕⎕⎕⎕⎕⎕⎕⎕⎕⎕⎕⎕ 

It looks linear for lengths 1 to 3, but jumps at length 4. If we look at lengths 4 to 6, we see a linear pattern, albeit considerably slower.

      ]RunTime -c Words⍳p4 Words⍳p5 Words⍳p6
  Words⍳p4 → 2.5E¯1 |  0% ⎕⎕⎕⎕⎕⎕⎕⎕⎕⎕⎕⎕⎕⎕⎕⎕⎕⎕⎕⎕⎕⎕⎕⎕⎕⎕⎕⎕⎕⎕⎕⎕⎕⎕⎕⎕⎕⎕   
* Words⍳p5 → 2.5E¯1 | +1% ⎕⎕⎕⎕⎕⎕⎕⎕⎕⎕⎕⎕⎕⎕⎕⎕⎕⎕⎕⎕⎕⎕⎕⎕⎕⎕⎕⎕⎕⎕⎕⎕⎕⎕⎕⎕⎕⎕⎕  
* Words⍳p6 → 2.6E¯1 | +4% ⎕⎕⎕⎕⎕⎕⎕⎕⎕⎕⎕⎕⎕⎕⎕⎕⎕⎕⎕⎕⎕⎕⎕⎕⎕⎕⎕⎕⎕⎕⎕⎕⎕⎕⎕⎕⎕⎕⎕⎕ 

What’s going on?! After a bit of research (I asked Morten!), I found that Dyalog is hashing Words extemporaneously when words exceeds 3 elements. Because the hash table is not retained, Words is hashed for each iteration in ]RunTime, causing the slowdown.

Since creating the hash table is a relatively expensive operation, it only makes sense to do if there is a mechanism to retain the table from which subsequent searches can benefit or the right argument is long enough to justify the upfront cost.

Tangent #2 – A Brief History of Hashing in Dyalog APL

First, a bit of terminology – search functions have a “principal” argument (the array being searched) and a “subject” argument (the items being searched for). In the example above, Words is the principal argument and words is the subject argument.

Hashing, in one form or another, has existed in Dyalog APL from its earliest days; it’s an industry standard technique. The interpreter decides, based on a number of factors, whether to hash an array extemporaneously or not. This hashing is an internal process and beyond the user’s control.

Dyalog v10.0, released in 2003, gave users the ability to bind a search function like  (index of),  (membership),  (intersection),  (union), or ~ (without) to its principal argument, resulting in a derived function that will, on its first invocation, create and retain a hash table. The disadvantage of this is that the hash table is used exclusively for the bound search function. If you needed to use more than one search function you would bind them individually and each would have its own hash table.

Dyalog v15.0, released in 2016, introduced 1500⌶ (hash array). This allows the user to mark an array for hashing and, after the first search operation creates the hash table, the hash table is available for all applicable search functions. array←1500⌶array returns a copy of array that is marked for hashing. The hash is created on the first invocation of a search function on array1(1500⌶)array returns 0 if array has not been marked for hashing, 1 if array has been marked for hashing but the hash has not been created yet, and 2 if array has a hash table. For example:

      1 (1500⌶) Words ⍝ not marked yet
0
      Words←1500⌶ Words ⍝ mark for hashing
      1 (1500⌶) Words
1
      Words⍳⊂'the' ⍝ perform a search (this is a bit slow)
      1 (1500⌶) Words ⍝ Words now has a hash table
2
      Words,←⊂'thermoflocker' ⍝ add a new word to the tail end
      1 (1500⌶) Words ⍝ still hashed
2
      Words← 1 ↓ Words ⍝ drop something from the front end
      1 (1500⌶) Words ⍝ no longer hashed nor marked for hashing
0

The size of the hash table can impact performance. In general, larger hash tables result in faster lookups. Dyalog v19.0, released in 2024, introduced 8468⌶ (hash table size), which allowed the user to adjust the size factor of created hash tables. Its purpose was to allow users to evaluate the potential side effects of a proposed larger hash table size.

Hash tables in Dyalog APL work best with (mostly) static principal arrays. In general, modifying the array invalidates the hash and the array will need to be rehashed. However, there are three forms of modified assignment that will preserve and efficiently update the hash – notice that they all involve the tail end of the principal array.

      R,←Y    ⍝ only for scalar or vector R
      R⍪←Y
      R↓⍨←Y   ⍝ only for negative singleton Y

Dyalog v20.0, released in 2025, implemented hash tables that are 8 times (2*3) larger than previously and also removed 8468⌶. More on this later…

Why Hash?

The simplistic approach to search functions like  and  is to perform a linear search, starting at the first element of the principal argument and iterating through its elements until you find a match. Obviously, elements that occur near the front will be found faster. In a worst case, searching for an element that’s not in the principal argument will have to search its entirety. Doing a linear search on the first word in Words and for a word not found in Words demonstrates this:

      ]RunTime -c "Words⍳⊂'the'" "Words⍳⊂'thermoflocker'"
  Words⍳⊂'the'           → 0.0E0  |    -100%                                          
* Words⍳⊂'thermoflocker' → 2.0E¯2 | +250200% ⎕⎕⎕⎕⎕⎕⎕⎕⎕⎕⎕⎕⎕⎕⎕⎕⎕⎕⎕⎕⎕⎕⎕⎕⎕⎕⎕⎕⎕⎕⎕⎕⎕⎕⎕⎕⎕⎕⎕⎕ 

Hashing smooths out this variability and makes all lookups relatively similar in performance, not to mention considerably faster. Doing the same search on aWords, a hashed version of Words, shows this.

      ]RunTime -c "aWords⍳⊂'the'" "aWords⍳⊂'thermoflocker'"
  aWords⍳⊂'the'           → 2.1E¯7 |   0% ⎕⎕⎕⎕⎕⎕⎕⎕⎕⎕⎕⎕⎕⎕⎕⎕⎕⎕⎕⎕⎕⎕⎕⎕⎕⎕⎕⎕⎕⎕⎕⎕⎕⎕⎕⎕     
* aWords⍳⊂'thermoflocker' → 2.4E¯7 | +11% ⎕⎕⎕⎕⎕⎕⎕⎕⎕⎕⎕⎕⎕⎕⎕⎕⎕⎕⎕⎕⎕⎕⎕⎕⎕⎕⎕⎕⎕⎕⎕⎕⎕⎕⎕⎕⎕⎕⎕⎕ 

“I Feel the Need for Speed” (Top Gun, 1986)

Let’s revisit the issue that led us down the hashing path. We’ll create a hashed copy of Words, but leave Words alone so that we can compare performance. We’ll also create a function bound with .

      hWords←1500⌶Words ⍝ hWords is marked for hashing
      hWords⍳⊂'the'      ⍝ first search creates the hash table
1
      fWords←Words∘⍳      ⍝ also create the derived function  
      fWords ⊂'the'      ⍝ first search creates the hash table
1
      p←'the' 'big' 'fuzzy' 'dog'
      ]RunTime -c "hWords ⍳ p" "fWords p" "Words ⍳ p"
                                                                        
  hWords ⍳ p → 0.0E0  |    -100%                                          
  fWords p → 0.0E0    |    -100%                                          
  Words ⍳ p  → 3.5E¯1 | +556800% ⎕⎕⎕⎕⎕⎕⎕⎕⎕⎕⎕⎕⎕⎕⎕⎕⎕⎕⎕⎕⎕⎕⎕⎕⎕⎕⎕⎕⎕⎕⎕⎕⎕⎕⎕⎕⎕⎕⎕⎕ 

Once we have a retained hash table, all lookups, no matter the length of words, will be faster.

Tangent #3 – When Does a Principal Argument Get Hashed?

The short answer is: it depends on a number of factors, such as:

  • whether a search function like  or  is used
  • the sizes of the principal and subject arrays
  • the datatypes of the arrays – character, integer, floating point, complex
  • are the arrays simple (depth 0 or 1) or not?
  • the amount of workspace available – can it fit the hash table?

In short, Dyalog APL hashes an array when it “thinks” doing so will help. However, you know your application and its data better than the interpreter does. In my example above, the interpreter can’t know if my search is a one-time thing or something that will be executed many times.

How can you determine where hashing kicks in? What I did was to start with a single element subject argument and increase its length until I saw a “bump” in runtime:

      iv←1e7?2*24  ⍝ build 10-million element integer vector with no duplicates

      ⍝ now time lookups for subject arrays of length 1 to 15
      ⎕SE.UCMD 'runtime -c',∊' iv⍳iv['∘,¨(⍕¨⍳15),¨⊂'⍴5000000]'
  iv⍳iv[1⍴5000000]  → 1.0E¯3 |     0%                                          
* iv⍳iv[2⍴5000000]  → 2.1E¯3 |  +100% ⎕                                        
* iv⍳iv[3⍴5000000]  → 3.2E¯3 |  +206% ⎕                                        
* iv⍳iv[4⍴5000000]  → 4.3E¯3 |  +315% ⎕⎕                                       
* iv⍳iv[5⍴5000000]  → 5.3E¯3 |  +412% ⎕⎕                                       
* iv⍳iv[6⍴5000000]  → 6.2E¯3 |  +503% ⎕⎕⎕                                      
* iv⍳iv[7⍴5000000]  → 7.3E¯3 |  +609% ⎕⎕⎕                                      
* iv⍳iv[8⍴5000000]  → 8.4E¯3 |  +718% ⎕⎕⎕⎕                                     
* iv⍳iv[9⍴5000000]  → 9.3E¯3 |  +800% ⎕⎕⎕⎕                                     
* iv⍳iv[10⍴5000000] → 1.0E¯2 |  +909% ⎕⎕⎕⎕⎕                                    
* iv⍳iv[11⍴5000000] → 9.2E¯2 | +8784% ⎕⎕⎕⎕⎕⎕⎕⎕⎕⎕⎕⎕⎕⎕⎕⎕⎕⎕⎕⎕⎕⎕⎕⎕⎕⎕⎕⎕⎕⎕⎕⎕⎕⎕⎕⎕⎕⎕⎕⎕ 
* iv⍳iv[12⍴5000000] → 9.1E¯2 | +8757% ⎕⎕⎕⎕⎕⎕⎕⎕⎕⎕⎕⎕⎕⎕⎕⎕⎕⎕⎕⎕⎕⎕⎕⎕⎕⎕⎕⎕⎕⎕⎕⎕⎕⎕⎕⎕⎕⎕⎕⎕ 
* iv⍳iv[13⍴5000000] → 9.2E¯2 | +8818% ⎕⎕⎕⎕⎕⎕⎕⎕⎕⎕⎕⎕⎕⎕⎕⎕⎕⎕⎕⎕⎕⎕⎕⎕⎕⎕⎕⎕⎕⎕⎕⎕⎕⎕⎕⎕⎕⎕⎕⎕ 
* iv⍳iv[14⍴5000000] → 9.2E¯2 | +8821% ⎕⎕⎕⎕⎕⎕⎕⎕⎕⎕⎕⎕⎕⎕⎕⎕⎕⎕⎕⎕⎕⎕⎕⎕⎕⎕⎕⎕⎕⎕⎕⎕⎕⎕⎕⎕⎕⎕⎕⎕ 
* iv⍳iv[15⍴5000000] → 9.2E¯2 | +8806% ⎕⎕⎕⎕⎕⎕⎕⎕⎕⎕⎕⎕⎕⎕⎕⎕⎕⎕⎕⎕⎕⎕⎕⎕⎕⎕⎕⎕⎕⎕⎕⎕⎕⎕⎕⎕⎕⎕⎕⎕ 

Can you spot where hashing kicks in? That’s right – when the subject array exceeds 10 elements. But what if my subject array is only ever a single element? Then you need to determine whether the one-time cost of building the hash table is less than the accumulated time of subsequent lookups. Once hashed, all lookups are faster.

One caveat about using the ]RunTime user command – the cost of creating the hash table on the first lookup of a hashed array is lost because ]RunTime executes each expression once before collecting timing information. ⎕PROFILE provides a more accurate picture:

     ∇ r←test_iv;iv;hiv;_;d;l;t;i
[1]    iv←10000000?2*24 ⍝ 10,000,000 integers in the range 1-2*24
[2]    hiv←1500⌶iv      ⍝ hiv is marked for hashing
[3]    i←5000000⊃iv     ⍝ search for the middle element
[4]   l1:⎕PROFILE¨'stop' 'clear' 'start'
[5]    _←iv⍳i  ⍝ unhashed lookup
[6]    _←hiv⍳i ⍝ first hashed lookup (creates hash table)
[7]    _←hiv⍳i ⍝ subsequent hashed lookup     
[8]   l2:⎕PROFILE'stop'
[9]    d←⎕PROFILE'data'
[10]   l←l1+⍳l2-l1+1 
[11]   r←(↓'%',⍨⍕⍪⌊0.5+100ׯ1+t÷⌊/t),(⎕NR⊃⎕SI)[1+l],⍨3⍕⍪t←d[;4]⌿⍨d[;2]∊l
[12]   ⎕PROFILE'clear'
     ∇

      test_iv
   1044%   1.047  _←iv⍳i  ⍝ unhashed lookup
 236125% 216.147  _←hiv⍳i ⍝ first hashed lookup (creates hash table) 
      0%   0.092  _←hiv⍳i ⍝ subsequent hashed lookup

In this case, the cost of creating the hash table is about 200× the cost of doing a single lookup. Subsequent hashed lookups are about 10× faster. It’s up to you, and your understanding of your application, to determine whether retaining the hash table is worth it.

TANSTAAFL (There Ain’t No Such Thing As A Free Lunch)

The other cost of using hash tables for faster searching is that hash tables take up space. Remember when I mentioned that the default hash table size in Dyalog v20.0 is 8x larger than previously? The working theory is that larger hash tables ought to result in faster searches, but how much faster and at what cost in space? Unfortunately there isn’t a direct way to measure the hash table size. You have to look at the differential in ⎕WA before and after creating the hash table:

      ]Config MAXWS
 MAXWS  1GB
       
      cf ⎕SIZE'Words' ⍝ cf is a utility to comma-format numbers
97,547,968

      cf ⎕WA-⍨(hWords⍳⊂'the')⊢(hWords←1500⌶Words)⊢⎕WA
268,435,664

In my 1GB workspace, the hash table for Words is 268MB and 2.75× the size of the Words itself. In Dyalog v20.0, we removed 8468⌶ which would allow you to set a scaling factor for the hash table size; there is an experimental I-Beam currently being developed, 8470⌶1 which does much the same thing. 8470⌶1 factor, where factor is an integer in the range ¯3 to 3, will increase or decrease the hash table size by 2*factor times. When Dyalog v20.0 was initially released, the default value for factor was 0 but based on feedback it’s now ¯3 Let’s use this to examine its effect on hash table size. I wrote an ugly little operator, set, to build hash tables with specified scaling factors and look at the ⎕WA differential after each:

      ]Config MAXWS
 MAXWS  10GB
      'abcdefg' ('Words'set) ¯4+⍳7
 aWords  ¯3       33,555,104 
 bWords  ¯2       67,109,536 
 cWords  ¯1      134,218,400 
 dWords   0      268,436,128 
 eWords   1      536,871,584 
 fWords   2    1,073,742,496 
 gWords   3    2,147,484,320 

As expected, each hash table grows by a factor of 2.

Tangent #4 – Mapped Files

The ⎕MAP system function associates a mapped file with an array in the workspace. One of the client projects I’ve worked on involves loading CSV data with 47 million records of 85 fields, totalling about 7.5GB. Each field is stored in a separate ⎕MAP-compatible file. In a 4GB workspace, I’m able to map all 85 files and have it seemingly consume only a bit over 2MB of workspace:

      ]Config MAXWS
 MAXWS  4GB 

      ⍝ MapFiles maps 85 files into variables in a namespace named Data
      cf wa←⎕WA ⋄ MapFiles ⋄ cf wa-⎕WA 
4,284,076,808
2,009,600

      cf +/Data.(⎕SIZE ⎕NL ¯2)
7,577,998,192

Pretty neat huh? This makes 7.5GB of data available in a 4GB workspace!

One of the fields, Data.Record_ID, is a 16-column character matrix and has a size of about 760MB:

      ⍴Data.Record_ID
47647772 16
      cf ⎕SIZE 'Data.Record_ID'
762,364,392

Let’s bind  with Data.Record_ID:

      lFind←Data.Record_ID∘⍳     ⍝ create the bound function
      lFind 1↑Data.Record_ID     ⍝ create the hash table
WS FULL
      fRec 1↑Data.Record_ID
      ∧

Uh oh… It seems we don’t have enough room in a 4GB workspace for the hash table. Let’s start a new session with 10GB:

      ]Config MAXWS
 MAXWS  10GB 
      lFind←Data.Record_ID∘⍳
      cf ⎕WA-⍨(lFind 1↑Data.Record_ID)⊢⎕WA
8,589,934,752

With the Dyalog v20.0 default scaling factor, the hash table takes 8.5GB of my 10GB workspace. That’s a hefty chunk. What if we try the smallest scaling factor, ¯3?

      8470⌶1 ¯3
0
      sFind←Data.Record_ID∘⍳
      cf ⎕WA-⍨(sFind 1↑Data.Record_ID)⊢⎕WA
 1,073,741,984

That’s more manageable and would fit in my 4GB workspace. Why did I use a bound function rather than 1500⌶ on Data.Record_ID? Currently, 1500⌶ doesn’t work with mapped files, but this may be taken under consideration in the future.

      z←1500⌶Data.Record_ID
DOMAIN ERROR
      z←1500⌶Data.Record_ID
            ∧

Tangent #5 – What Timer Is It?

The ]runTime user command is a wonderfully easy tool to use to get a rough idea of performance and it remains a staple in my toolbox. runtime is based on cmpx which is found in the dfns workspace. I’ve found that runtime‘s results can sometimes vary significantly from one invocation to the next. Dyalog APL provides several system functions to help collect performance data:

  • ⎕AI, one of whose elements is cumulative CPU time of your session. You can use the before and after differential of ⎕AI to get an approximate idea of the speed of an expression. This is what runtime and cmpx use.
  • ⎕MONITOR, which can be used to turn monitoring on for specific lines of a function.
  • ⎕PROFILE, the “heavy hitter” of performance measurement. Even though its primary use case is profiling the performance of entire applications, I still find it useful to get impressive-looking, high-precision, performance data.

I have a template that I use when I want to use ⎕PROFILE to compare performance of expressions:

     ∇ r←timer n;i;d;l;t
[1]   ⍝ n is the number of iterations to run
[2]   ⍝ r is [;1] the relative percents based on the fastest expression
[3]   ⍝      [;2] the accumulated time in ms for the expression
[4]   ⍝      [;3] the expression
[5]    ⎕PROFILE¨'stop' 'clear' 'start'
[6]   l1: :For i :In ⍳n
[7]   ⍝ insert expressions to time between l1 and l2
[8]   l2: :EndFor
[9]    ⎕PROFILE'stop'
[10]   d←⎕PROFILE'data'
[11]   l←l1+⍳l2-l1+1
[12]   r←(↓'%',⍨⍕⍪⌊0.5+100ׯ1+t÷⌊/t),({⍵↓⍨+/∧\' '=⍵}¨(⎕NR⊃⎕SI)[1+l]),[1.1]⍨↓3⍕⍪t←d[;4]⌿⍨d[;2]∊l
[13]   ⎕PROFILE'clear'
     ∇

The Speed/Space Tradeoff

We saw earlier that different scaling factors result in different size hash tables, but what’s the impact on the speed of searching? Using our 7 hashed versions of Words and running 1,000,000 iterations:

 9%   547.303  _←aWords⍳phrase 
 6%   534.984  _←bWords⍳phrase 
 0%   504.180  _←cWords⍳phrase 
 0%   504.822  _←dWords⍳phrase 
 0%   505.082  _←eWords⍳phrase 
 0%   505.404  _←fWords⍳phrase 
 0%   504.561  _←gWords⍳phrase 

In this example, the smallest hash table, aWords runs 9% slower than the 8-times-larger default, dWords. There’s no significant speedup using a hash table larger than cWords, at half the default size.

Let’s take a look at my 47-million record table. Since 1500⌶ doesn’t work (yet) with mapped files, we’ll have to use function binding. First, we’ll use the default setting of 8470⌶1 0 to create an 8.5GB hash table and then use 8470⌶1 ¯3 to create a hash table 1/8 (2*¯3) the default size or about 1GB.

      {}8470⌶1 0 ⋄ b←⎕WA ⋄ lfind←Data.Record_ID∘⍳ ⋄ {}lfind 2↑Data.Record_ID ⋄ cf b-⎕WA
  8,589,934,808
      {}8470⌶1 ¯3 ⋄ b←⎕WA ⋄ sfind←Data.Record_ID∘⍳ ⋄ {}sfind 2↑Data.Record_ID ⋄ cf b-⎕WA
  1,073,742,040
      recs←Data.Record_ID[10?≢Data.Record_ID;]
      timer 1e6
  0%    920.916  _←lfind recs 
 11%   1025.790  _←sfind recs 

Is an 11% speedup worth an extra 7.5GB of workspace? That’s really up to you and your priorities for your application.

The Long and Winding Blog (with apologies to The Beatles)

Let’s try to summarize…

If your application needs to search data that’s “mostly” static, you can benefit from using retained hash tables. By “mostly”, I mean that the only changes to the array are adding or deleting elements from the end. A typical scenario might be, during application initialization, load the data into the workspace, or map a file, and do a search, thereby creating the hash table. Then all subsequent uses of search functions on that array will be considerably faster.

I’ve got some ideas on things that we at Dyalog Ltd might want to consider doing. Most of these involve empowering the user to have more control over how and when hashing is done. For example, we could:

  • make 8470⌶1 ready for release and publish it so that users can understand how to tune hash table size for their best space/speed tradeoff.
  • make 1500⌶ work with mapped files.
  • make it easier to query the size of a hash table rather than relying on ⎕WA differentials.
  • make it possible to mark an array as “unhashable”. Consider the scenario where hash-table-triggering searches are done on an array that’s not static. Whenever the array changes, the hash table is discarded, only for a new hash table to be generated on a subsequent search. In this case, it’s probably better that the interpreter fall back to a non-hashing approach.
  • Make it possible to monitor where, when, and how often extemporaneous hashing is done.

Disclaimers – YMMV (Your Mileage May Vary)

The examples shown in this post are a very small sampling of possible hashing scenarios. They were run on my 32GB Lenovo laptop using Windows 11 and Dyalog v20.0. Your environment and hashing opportunities are likely to be different. In writing this post, I hope to have accomplished spurring you on to do your own investigations as there are potentially significant benefits to be explored.

I was caught off guard by the apparent slowdown due to the interpreter repeatedly hashing Words extemporaneously. This led me to try to understand how and when hashing is done and what tools are available to the user. I feel I’ve been marginally successful at this, but it feels like there is still much to learn.

Addendum

I wrote the above in January 2026. Sharing my findings with the Dyalog development team set in motion an initiative to review some aspects of doing lookups. One result of this initiative was to change the default scaling factor for hash table size (8470⌶1 x) from 0 to ¯3. This means that, by default, hash tables in the latest releases of Dyalog v20.0 are 1/8 the size that they were before. Changing to a smaller hash table scaling factor results in slightly slower lookups, but at a significant savings in workspace consumed.

Other work looking at the performance of lookup functions is being undertaken.

Lookups are Complicated

When you use a lookup function like  or , the interpreter attempts to pick the best technique, in order from simplest to most complex, between doing a linear search, using a lookup table, or using a hash table. The decision is based on datatype, size, and depth of the arguments, workspace available, and whether the cost of doing the setup of a more complex technique is likely to result in faster overall execution. In general, the interpreter does a good job of deciding. That doesn’t mean there aren’t exceptions. Again, this is where you come in – you know your data and how it’s used.

Working with LLMs and Dyalog

Notes about this blog post:

  • In this blog post, I’m using macOS and Docker. If you’re a Microsoft Windows user and you want to follow along, Docker works well on WSL2.
  • AI is a fast-moving field, and I’ll assume some familiarity with LLMs in terms of terminology.

Working with an AI coding “agent” can make us more productive by automating boiler plating, helping with testing, and so on. LLMs are very good at languages like Python and C#, but have struggled with APL. We can speculate as to why this is, but the answer is most likely as mundane as the lack of APL “out there”. The training sets are sparse when it comes to APL. The other aspect is one of incentives: no frontier AI laboratory has any real incentive to make their models better at APL; they’re usually Python shops.

However, the pace of improvement in LLMs generally, and the drive towards “smarter, not bigger” models, now make LLMs viable as a productivity tool when working with Dyalog APL. The latest models from Anthropic, OpenAI, and Google today write passable APL – still a bit naive and Python-like, but capable of writing functional, non-trivial APL. In this blog post, I will outline my working practices and set-up, and a few practical tips on how to make an LLM more fluent in APL.

Warning: using an AI coding agent requires care. Although running an AI agent in a container narrows the blast radius, many risks remain unavoidable, especially when running in more autonomous modes.

“The November 2025 Inflection Point”

Two model releases happened in November, 2025 – Claude Opus 4.5 and GPT-5.2 – within days of each other. Simon Willison coined the expression The November 2025 Inflection Point for this quantum leap. Up until then, LLM performance on APL was abysmal: they were unable to understand the right-to-left execution order and really struggled with the array model in general, let alone syntax. After the November release, all of that changed. Although the models were still not exactly fluent in APL, it was a real step change, especially in their ability to explain APL code. APL performance is lifted by the general improvement in models over time – it remains far behind the performance in more mainstream languages, but is now something that is approaching useful to APL programmers.

Tooling Improvements

In conjunction with the model improvements, suddenly “Agents” took off. How we interact with LLMs has also evolved, from the original CoPilot smart auto-complete, to copy-pasting code into the ChatGPT web interface, to chat-window-integrated editors (like the first generation of Cursor or Windsurf), to today’s console agents, like Anthropic’s Claude Code or OpenAI’s Codex CLI. A console agent is quite a simple idea; it is essentially a loop around an LLM interaction with the ability to call external tools. A console agent’s tool calling model fits very neatly together with the “unix philosophy” of small, composable tools that do one thing. We now have a convenient way of extending the capabilities of AI-powered development tools and, of course, tools like CoPilot and Cursor are now fully “agentic” too.

Evaluating APL

With tool calling in an agent, we can give an LLM the ability to actually evaluate APL, which, in conjunction with the post-inflection point models, makes a real difference in the productivity you can get from LLMs when working with APL. There are several ways you can achieve this, the simplest being the dyalogscript CLI, which has shipped with Dyalog since Dyalog v19.0. Teaching Claude Code how to use dyalogscript is remarkably simple – just make Claude aware of its existence, and tell it to work out how to use it:

❯ Figure out how to use /usr/local/bin/dyalogscript to evaluate APL

[a few minutes of Claude poking dyalogscript]

●  Figured out. Here's how to evaluate APL with /usr/local/bin/dyalogscript.

What it is

dyalogscript (symlink → Dyalog 21.0's scriptbin/dyalogscript, a compiled binary) runs a file of APL source by launching dyalog ... -script FILE. It takes a script file argument — not an inline expression. (Your existing apl alias just opens the Dyalog 19.0 GUI app; dyalogscript is the headless evaluator.)

Basic usage

dyalogscript path/to/script.apls         # run a file
dyalogscript script.apls arg1 arg2       # args land in ⎕ARG
dyalogscript MAXWS=300Mb script.apls     # options go BEFORE the file (or on the shebang)
Inside a script: statements are separated by newlines or ⋄, output with ⎕←, and strings use single quotes ('hi', not "hi").

⚠️ The one real gotcha: output uses \r, not \n

⎕← terminates each line with a carriage return, so in a terminal/pipe lines overwrite each other and look concatenated (455Hello…). Fix by normalizing:
dyalogscript script.apls | tr '\r' '\n'

Ad-hoc evaluation without a temp file

All of these work because the wrapper only needs a readable file path:
# pipe via /dev/stdin (most portable)
printf '⎕←+/⍳10\n' | dyalogscript /dev/stdin | tr '\r' '\n'

# heredoc
dyalogscript /dev/stdin <<'APL' | tr '\r' '\n'
⎕←2+2
⎕←3 3⍴⍳9
APL

# process substitution
dyalogscript <(printf '⎕←⌽⍳5\n') | tr '\r' '\n'
Or make a script self-executable with a shebang (as the samples in …/Dyalog/Samples/scripts/ do):
#!/usr/local/bin/dyalogscript MAXWS=64Mb
⎕←'hello'

Errors

Uncaught errors print inline (error type, the offending line, and a ∧ caret) and halt the script. Note: exit code is always 0, even on error — so detect failures by scanning output, not $? (wrap risky code in :Trap/⎕TRAP if you need control flow).

Well done, Claude (despite the hallucination of ⎕ARG in a comment). However, doing this every time you start Claude soon gets tedious. Fortunately, Claude Code has a mechanism for encoding such things durably: skills. A “Claude skill” is a piece of Markdown prose that encodes some trigger condition with a brief description of the tool or behaviour that it’s concerned with. You can view/download my dyalogscript skill from the Dyalog Labs GitHub, or you could tell Claude to write one for you after it’s worked out how to use it.

Let’s ask Claude to pick up the skills file:

❯ Grab the skill from https://github.com/dyalog-labs/agent-dev-container/blob/main/.devcontainer/kit/.claude/skills/dyalog-script/SKILL.md

●  I'll grab the raw file. Let me fetch it from the raw GitHub URL.

●  Bash(curl -fsSL "https://... [snip]")

●  Got it — a self-contained skill. Let me check whether the skill directory has any sibling files (scripts/resources) I should grab too.

●  Bash(curl -fsSL "https://... [snip]")

●  Installed and verified — 1279 bytes, an exact match for GitHub's reported size, so it's byte-for-byte identical and the APL glyphs survived intact.

  Location: .claude/skills/dyalog-script/SKILL.md (it was the only file in that skill's directory — nothing else to grab).

  A few notes:

  - Availability: Skills load at startup, so dyalog-script will show up as an invocable skill in your next Claude Code session, not this one.
  - Scope: I installed it at project-local scope (/.claude/skills/), so it's available in this project. Say the word if you'd rather have it user-scope. (~/.claude/skills/).
  - Content: It matches exactly what we worked out last turn — dyalogscript /dev/stdin with echo/heredoc, and ⎕← to print. One thing the skill doesn't mention that we discovered: on this macOS install, ⎕← separates lines with \r, so for clean multi-line terminal output you may still want to pipe through tr '\r' '\n'.

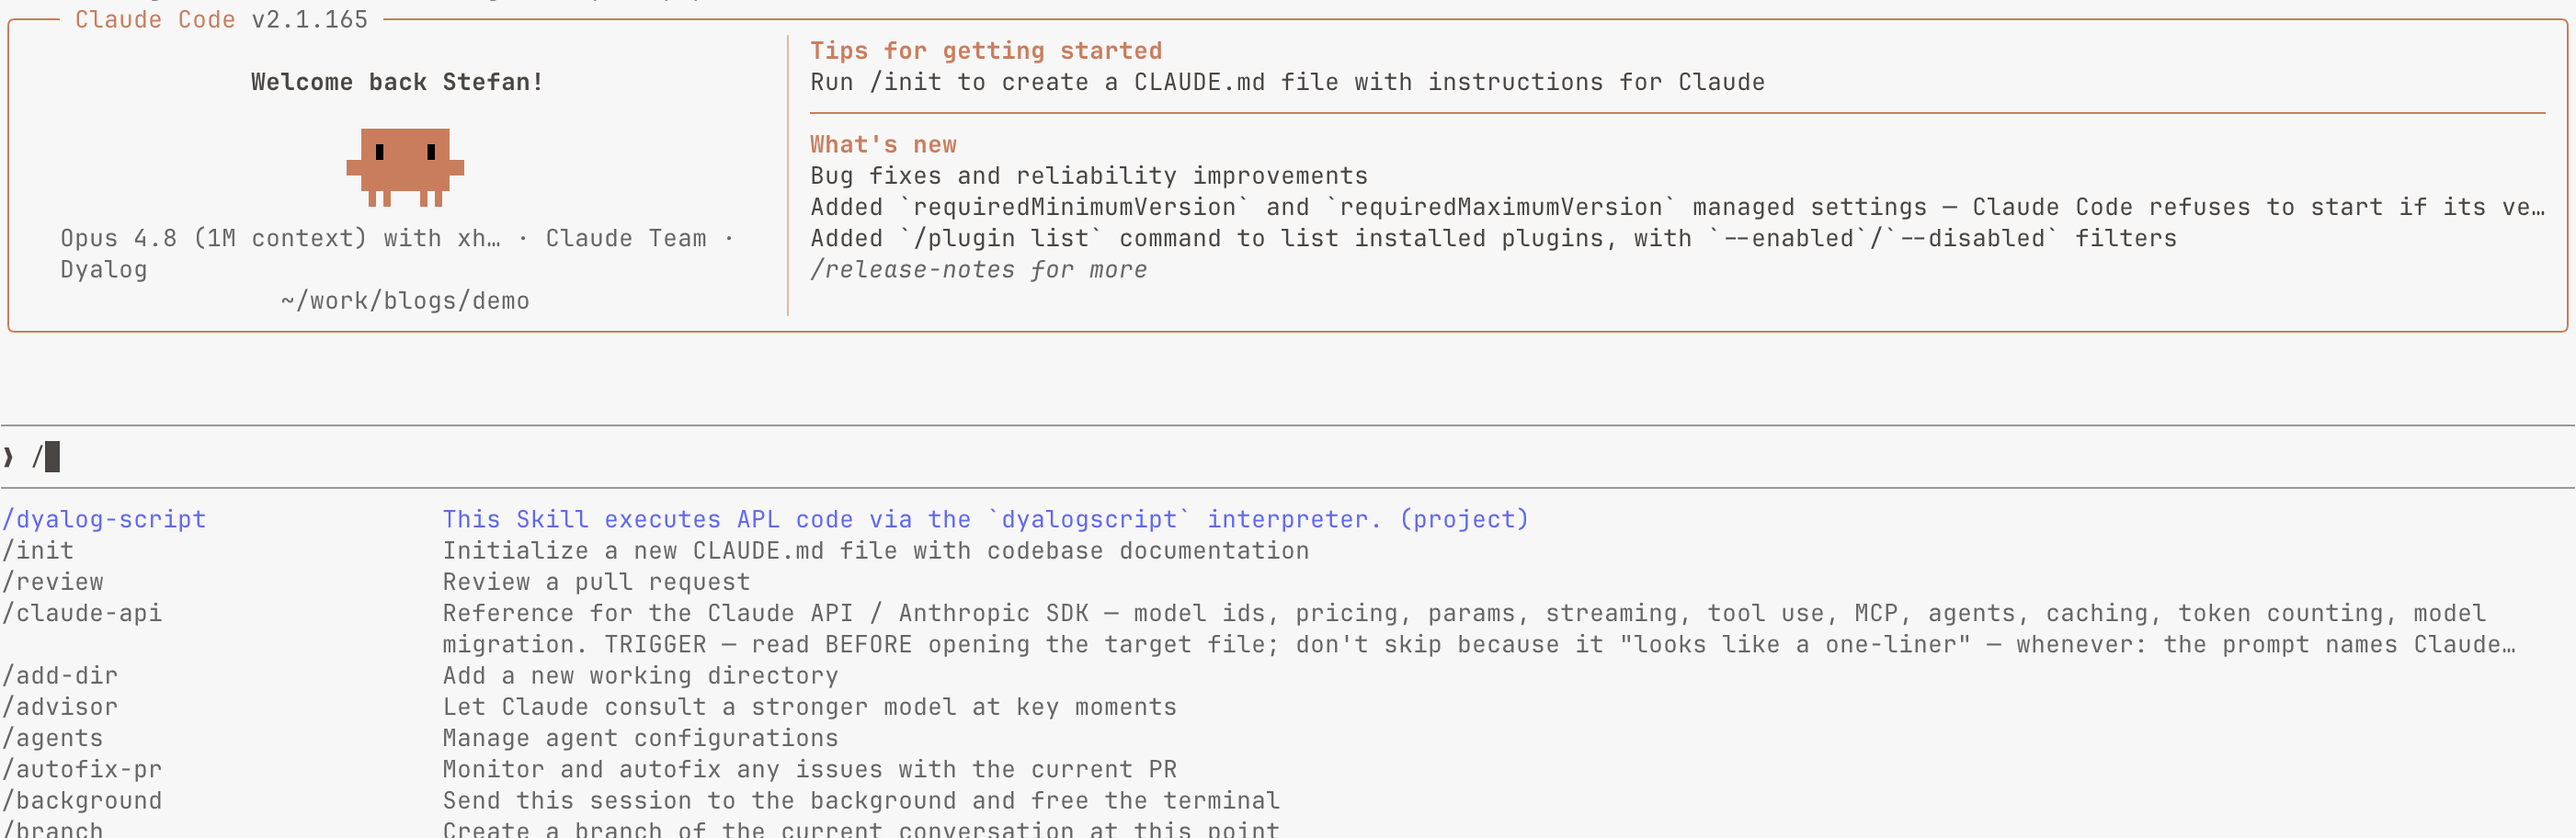
We need to restart Claude Code for it to pick it up. After restart, hitting / shows the available skills and commands, and we should see our fresh dyalogscript skill:

Claude Code showing the available skills and commands

Claude Code showing the available skills and commands

Claude should now be able to run APL expressions by itself. Let’s test that (note that the apparently mangled lines are due to the line break issues mentioned above):

❯ Evaluate the following Dyalog APL expression and tell me how it works: 3 (⍴⍴1,0⍴⍨⊢+.*∘⍳-∘≢) 4

●  I'll analyze this expression carefully, then verify my reasoning by running it.

  Let me first work through the structure, then check it against the interpreter.

●  Skill(dyalog-script)
  ⎿  Successfully loaded skill

●  Bash(dyalogscript /dev/stdin <<'EAPL'
      ⎕←'=== full result ==='…)
  ⎿  [tool calling log removed for brevity]

●  Bash(dyalogscript /dev/stdin <<'EAPL'
      ⍝ break down the inner tines with X=3 (left), Y=4 (right)…)
  ⎿  [tool calling log removed for brevity] 

●  Confirmed. The result is a 4×4×4 identity tensor — a rank-3 array with 1s on the main diagonal (where all three indices are equal) and 0s everywhere else:

1 0 0 0      0 0 0 0      0 0 0 0      0 0 0 0
0 0 0 0      0 1 0 0      0 0 0 0      0 0 0 0
0 0 0 0      0 0 0 0      0 0 1 0      0 0 0 0
0 0 0 0      0 0 0 0      0 0 0 0      0 0 0 1

What it really is

This is a generalized identity-array generator. The left argument is the rank (3) and the right argument is the dimension (4), so 3 (…) 4 builds the 4×4×4 identity. (2 (…) 4 would give an ordinary 4×4 identity matrix.)

How it works

The parenthesised part is a train (tacit function). Operators bind tighter than the train, so first the derived functions form: +.*∘⍳ is (+.*)∘⍳, and -∘≢ is (-)∘(≢). That
leaves 9 tines, which—being odd-length—nest as right-grouped forks:

(⍴ ⍴ (1 , (0 ⍴⍨ (⊢ +.*∘⍳ -∘≢))))

Evaluating with X←3 (rank r), Y←4 (dimension n), inside-out:

Innermost fork (⊢ +.*∘⍳ -∘≢) — a fork applies as (X f Y) g (X h Y):
- Left tine 3⊢4 → 4 (the dimension n)
- Right tine 3(-∘≢)4 → 3 - ≢4 → 3 - 1 → 2 (this is r-1, the top exponent; ≢ of a scalar is 1)
- Middle 4 (+.*∘⍳) 2 → 4 +.* ⍳2 → 4 +.* 1 2 → 4^1 + 4^2 → 20

- That inner product computes Σ n^k for k=1…r-1 = 4 + 16 = the number of zeros needed.

0 ⍴⍨ 20 → 20 ⍴ 0 → twenty 0s.

1 , … → 1 0 0 … 0, length 21. This is the key: the vector's period is 1 + n + n²= 21.

Outer fork (⍴ ⍴ …):
- Left tine 3⍴4 → 4 4 4 (the shape: r copies of n)
- Reshape: 4 4 4 ⍴ (1,20⍴0)

Reshaping recycles the 21-element vector across 64 cells. The flat index of each diagonal element (i,i,i) is i × (1+n+n²) = i × 21, which lands exactly on the recycled 1s (flat indices 0, 21, 42, 63) — producing the identity tensor.

The idea in one line

It's the classic identity-matrix idiom n n ⍴ 1, n⍴0 lifted to arbitrary rank: the period (nʳ−1)/(n−1) = 1+n+…+nʳ⁻¹ makes a single 1 recur precisely on the main diagonal, and the train computes that period tacitly from the rank/dimension arguments.

✻ Crunched for 2m 24s

From this, we can note several things. Firstly, Claude worked out that it needed to load and invoke the dyalogscript skill, and secondly, it did a decent job of dissecting the fairly complex tacit expression for arbitrary rank identity matrix. It approached the job methodically, and tested as it progressed through the process.

At the time of writing, trying the same expression with the latest ChatGPT without the ability to evaluate returns a confident, but unfortunately nonsensical answer.

“Skills” is now an open standard, and OpenAI supports it, too. If I’d given OpenAI’s Codex tool the same skill, it would have solved it, too.

If you only take one thing from this blog post, then it should be this: enabling APL evaluation unlocks a lot of APL ability in the latest models.

Stateful APL evaluation

dyalogscript isn’t stateful – it runs an expression or file, and then exits. This doesn’t help you if you are working in a large, complex, APL application. For that you need a different mechanism, either connecting using the Ride port, or using an editor extension for something like VS Code. We’re currently working on such solutions, but that is out of scope for this blog post.

Containerising for Improved Safety

Safety when using AI is an important topic, and too big to do justice in a blog post like this. Running an agent locally, directly on your machine, exposes you to real risk: the agent can read, write, and delete files, install software, access credentials, access the local network and, of course, the web. Although the agents from reputable AI providers generally have both a good track record and plenty of internal guardrails, the risks are real. So what can you do if you want to experiment with AI agents whilst at the same time taking steps to minimise your exposure? One way is to run the agent in a container; this alone doesn’t mean “safe”, but it should at least decrease the blast radius.

I run Claude Code in a dev container, a Docker container that is configured to be seamlessly picked up by code editors like VS Code and Zed. We don’t publish a built container image, nor do we support it, but you can see and use its source code on Dyalog Labs, a GitHub organisation that we use at Dyalog Ltd specifically for experimenting with potentially-useful things that haven’t yet reached the standard for an “officially supported product”. The relevant repository is agent-dev-container – make sure that you examine it closely before you decide to make use of it.

Running Claude in the container means that it can see only the directory in which it was started and those below it. This container comes with an optional “starter kit” Claude code configuration and set-up – you already saw the dyalogscript skill. Let’s explore some of its features.

Start by cloning the dev container repository and lifting its configuration into our project repository:

~/work/tmp  $ git clone git@github.com:dyalog-labs/agent-dev-container.git
Cloning into 'agent-dev-container'...
remote: Enumerating objects: 67, done.
remote: Counting objects: 100% (67/67), done.
remote: Compressing objects: 100% (50/50), done.
remote: Total 67 (delta 21), reused 55 (delta 12), pack-reused 0 (from 0)
Receiving objects: 100% (67/67), 55.42 KiB | 2.52 MiB/s, done.
Resolving deltas: 100% (21/21), done.
~/work/tmp  $ mkdir my-project
~/work/tmp  $ cd my-project
~/work/tmp/my-project  $ cp -r ../agent-dev-container/.devcontainer .
~/work/tmp/my-project  $ code .

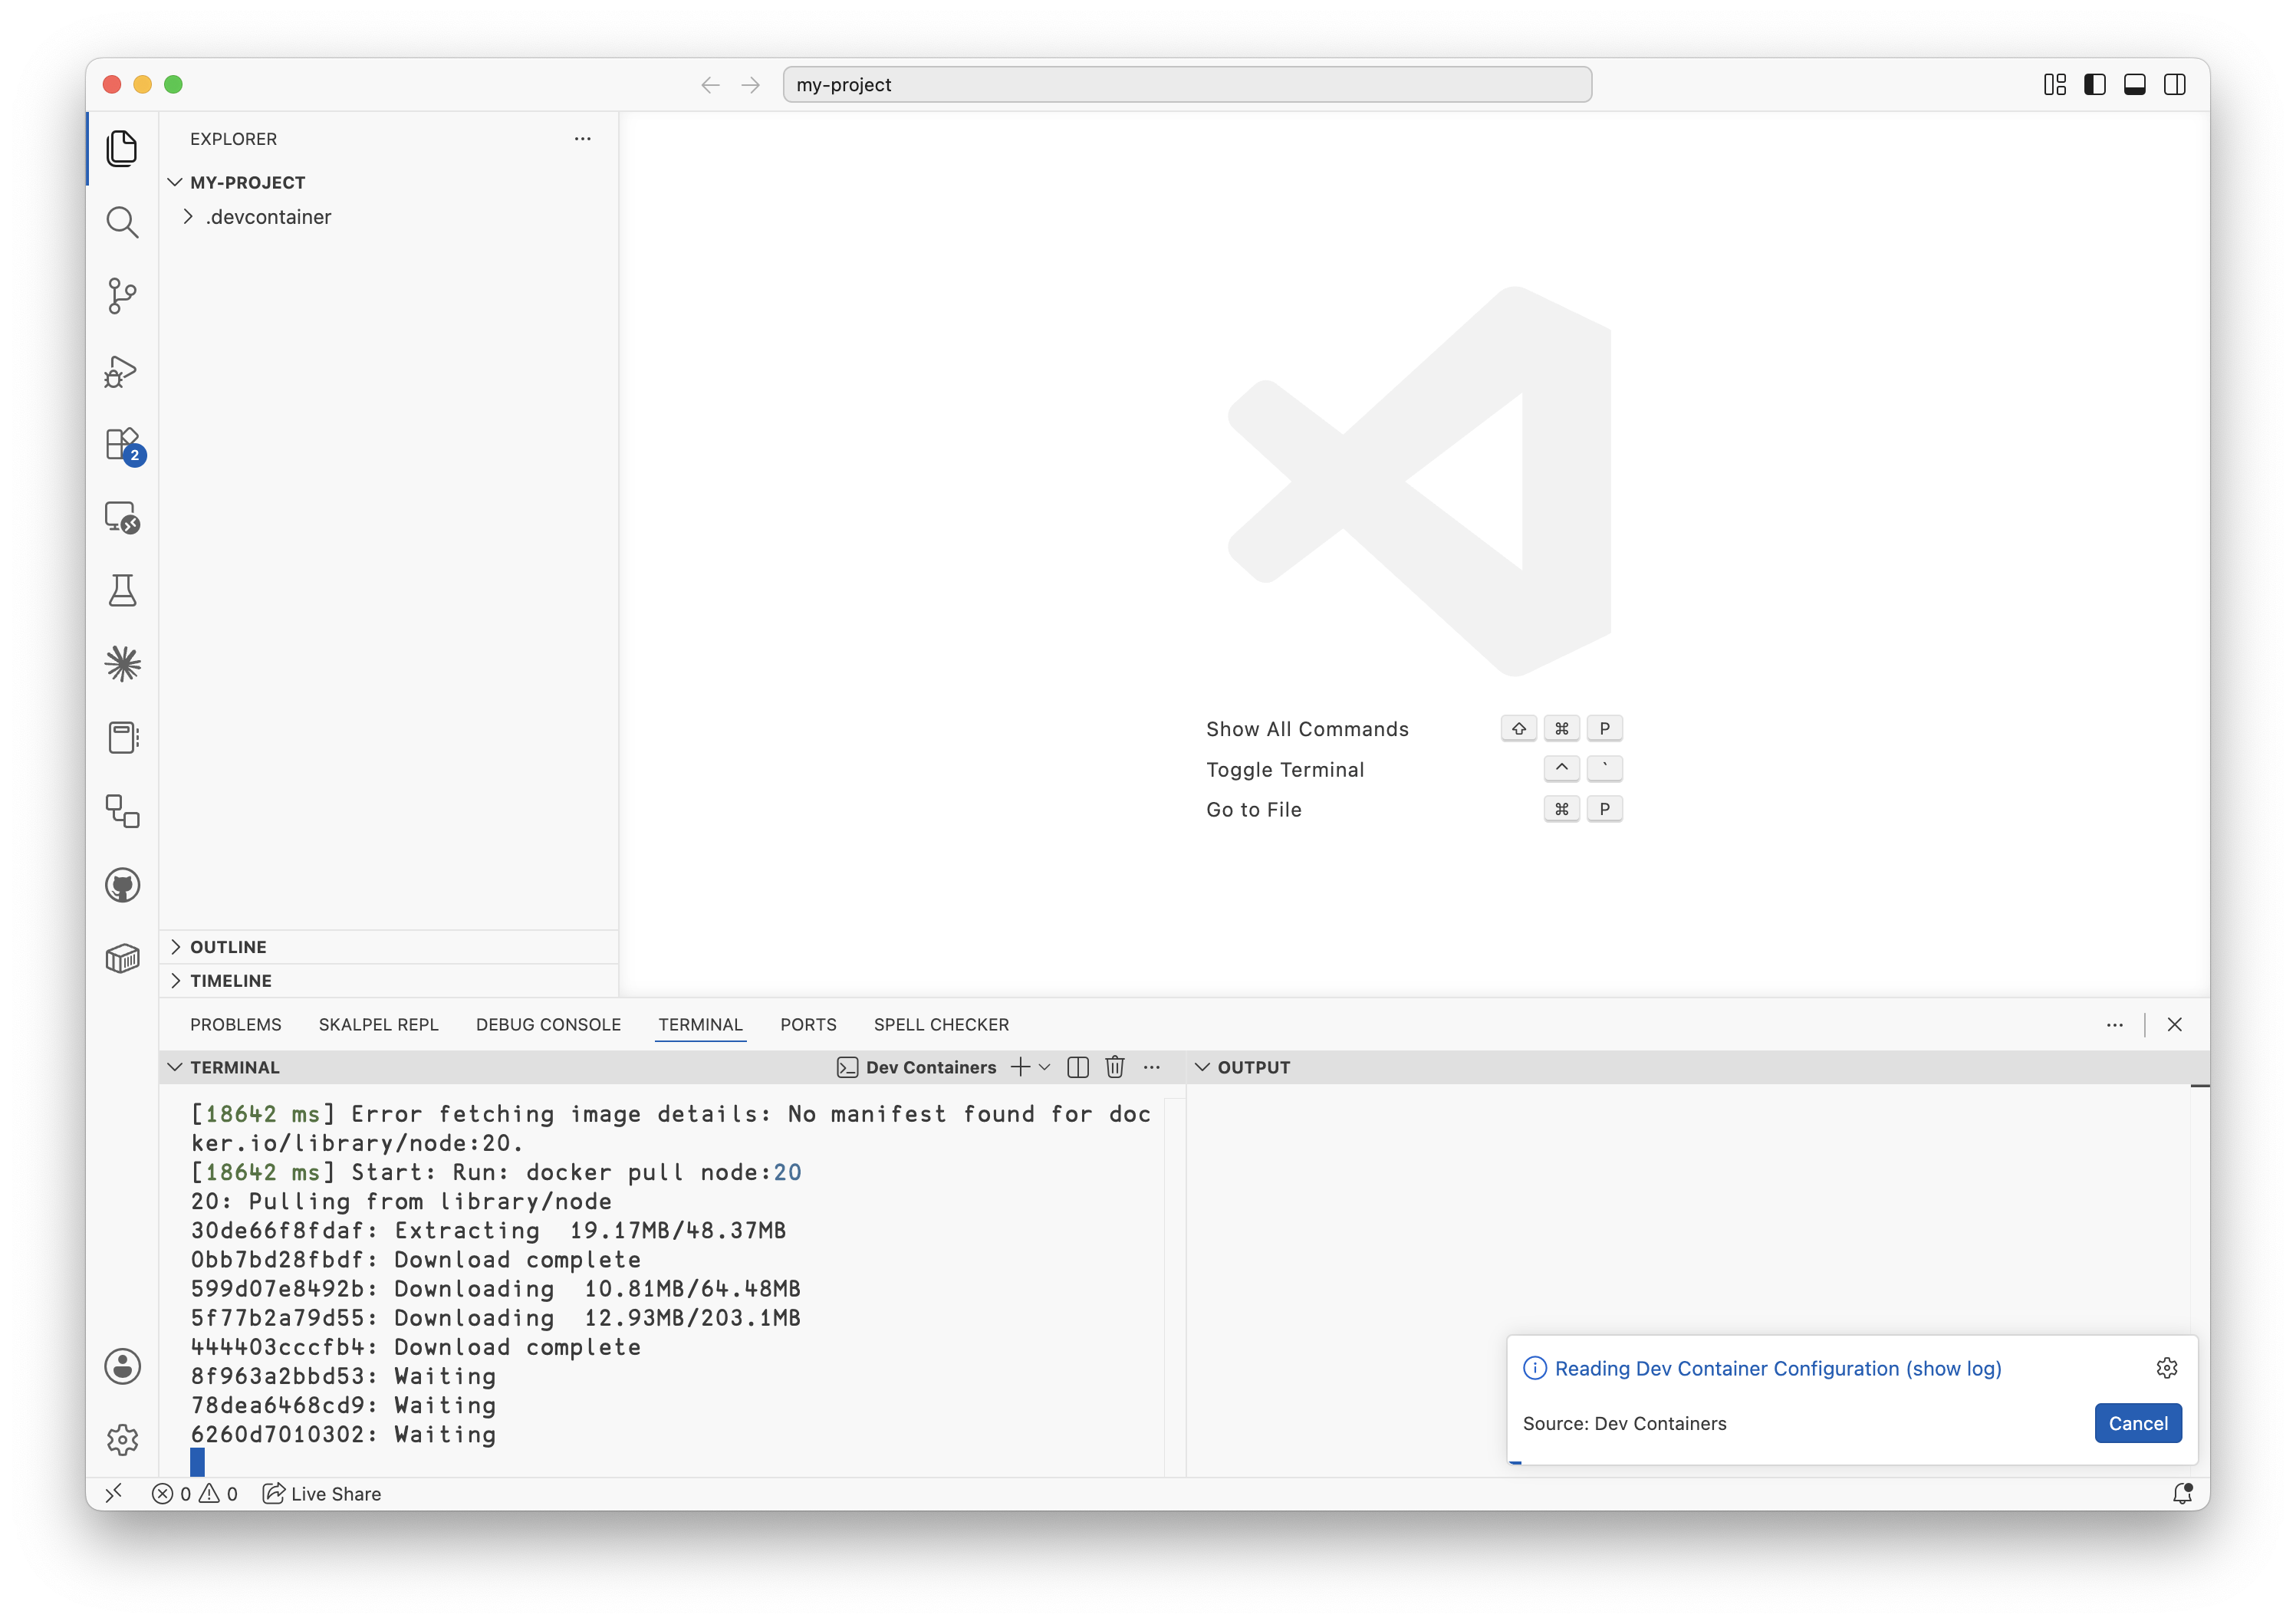
Opening the directory with VS Code lets it recognise that it contains a dev container and offer to open it in container mode. The first time we do this we trigger the container build, which can take several minutes to complete:

First open of dev container

First open of dev container

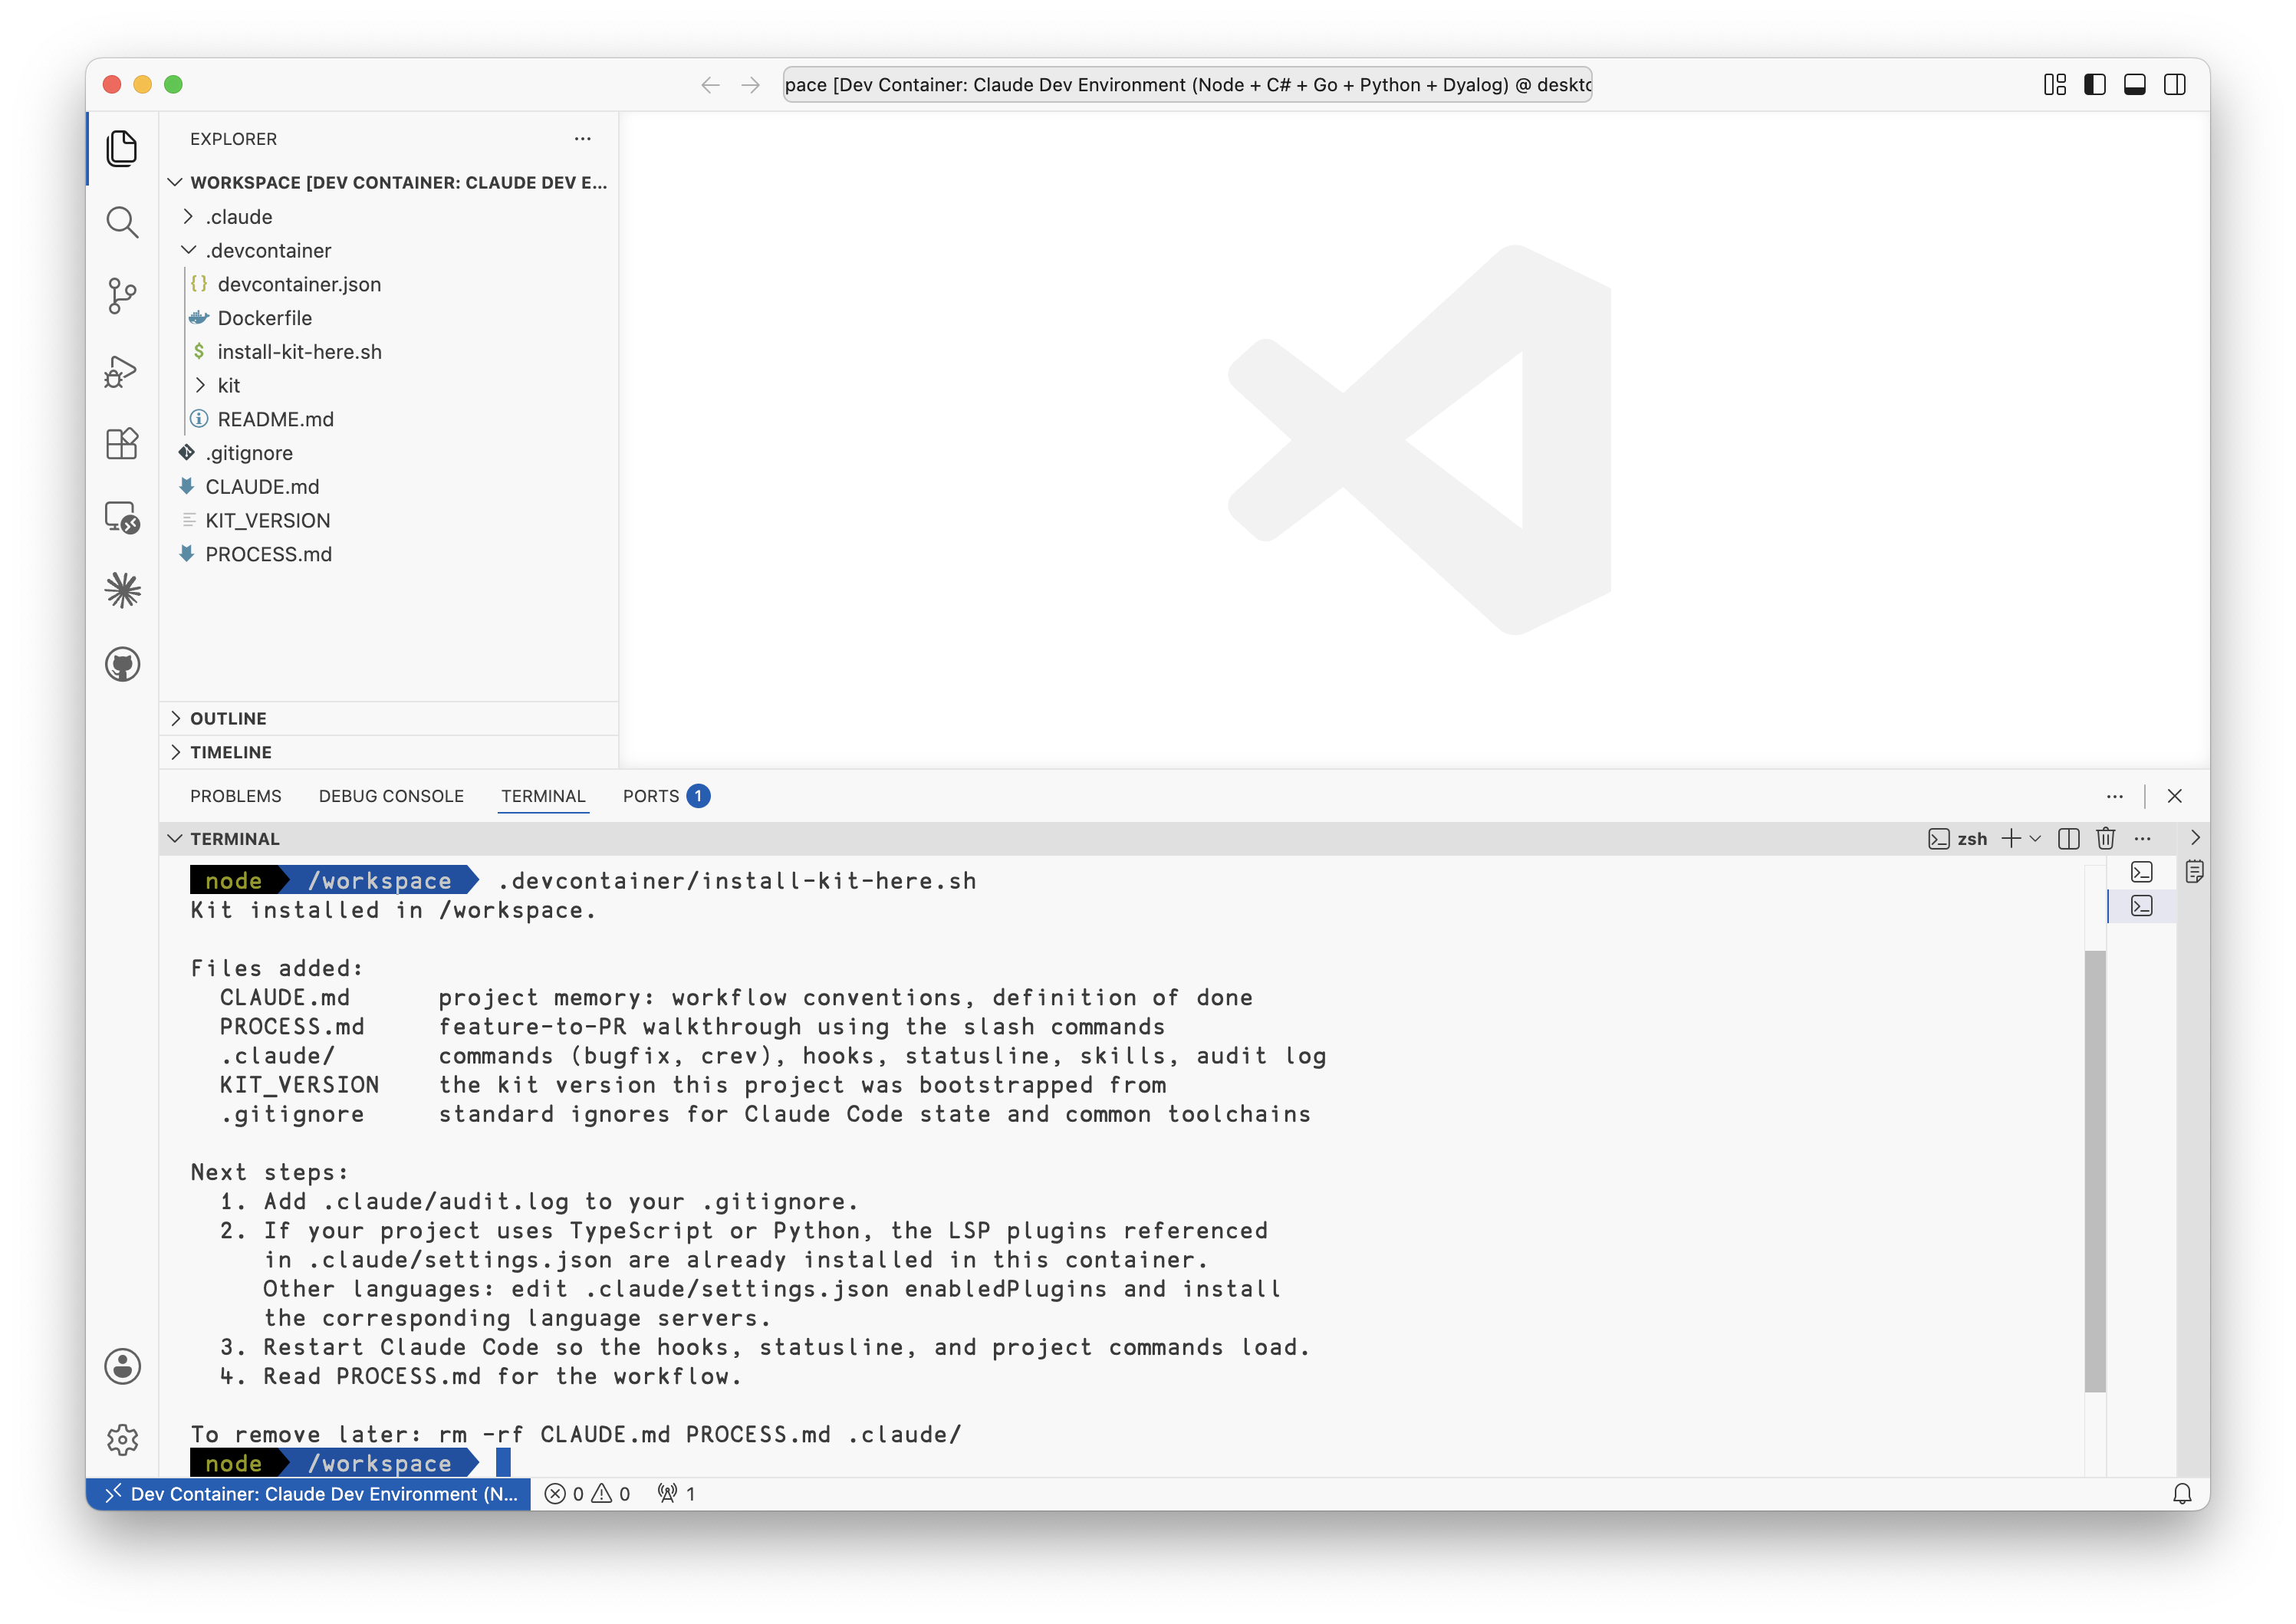
Open the terminal pane, and run the kit installation command to surface the Claude Code configuration (by keeping the dev container itself separate from the Claude configuration, you can choose to use either or both):

Install Claude "kit"

Install Claude “kit”

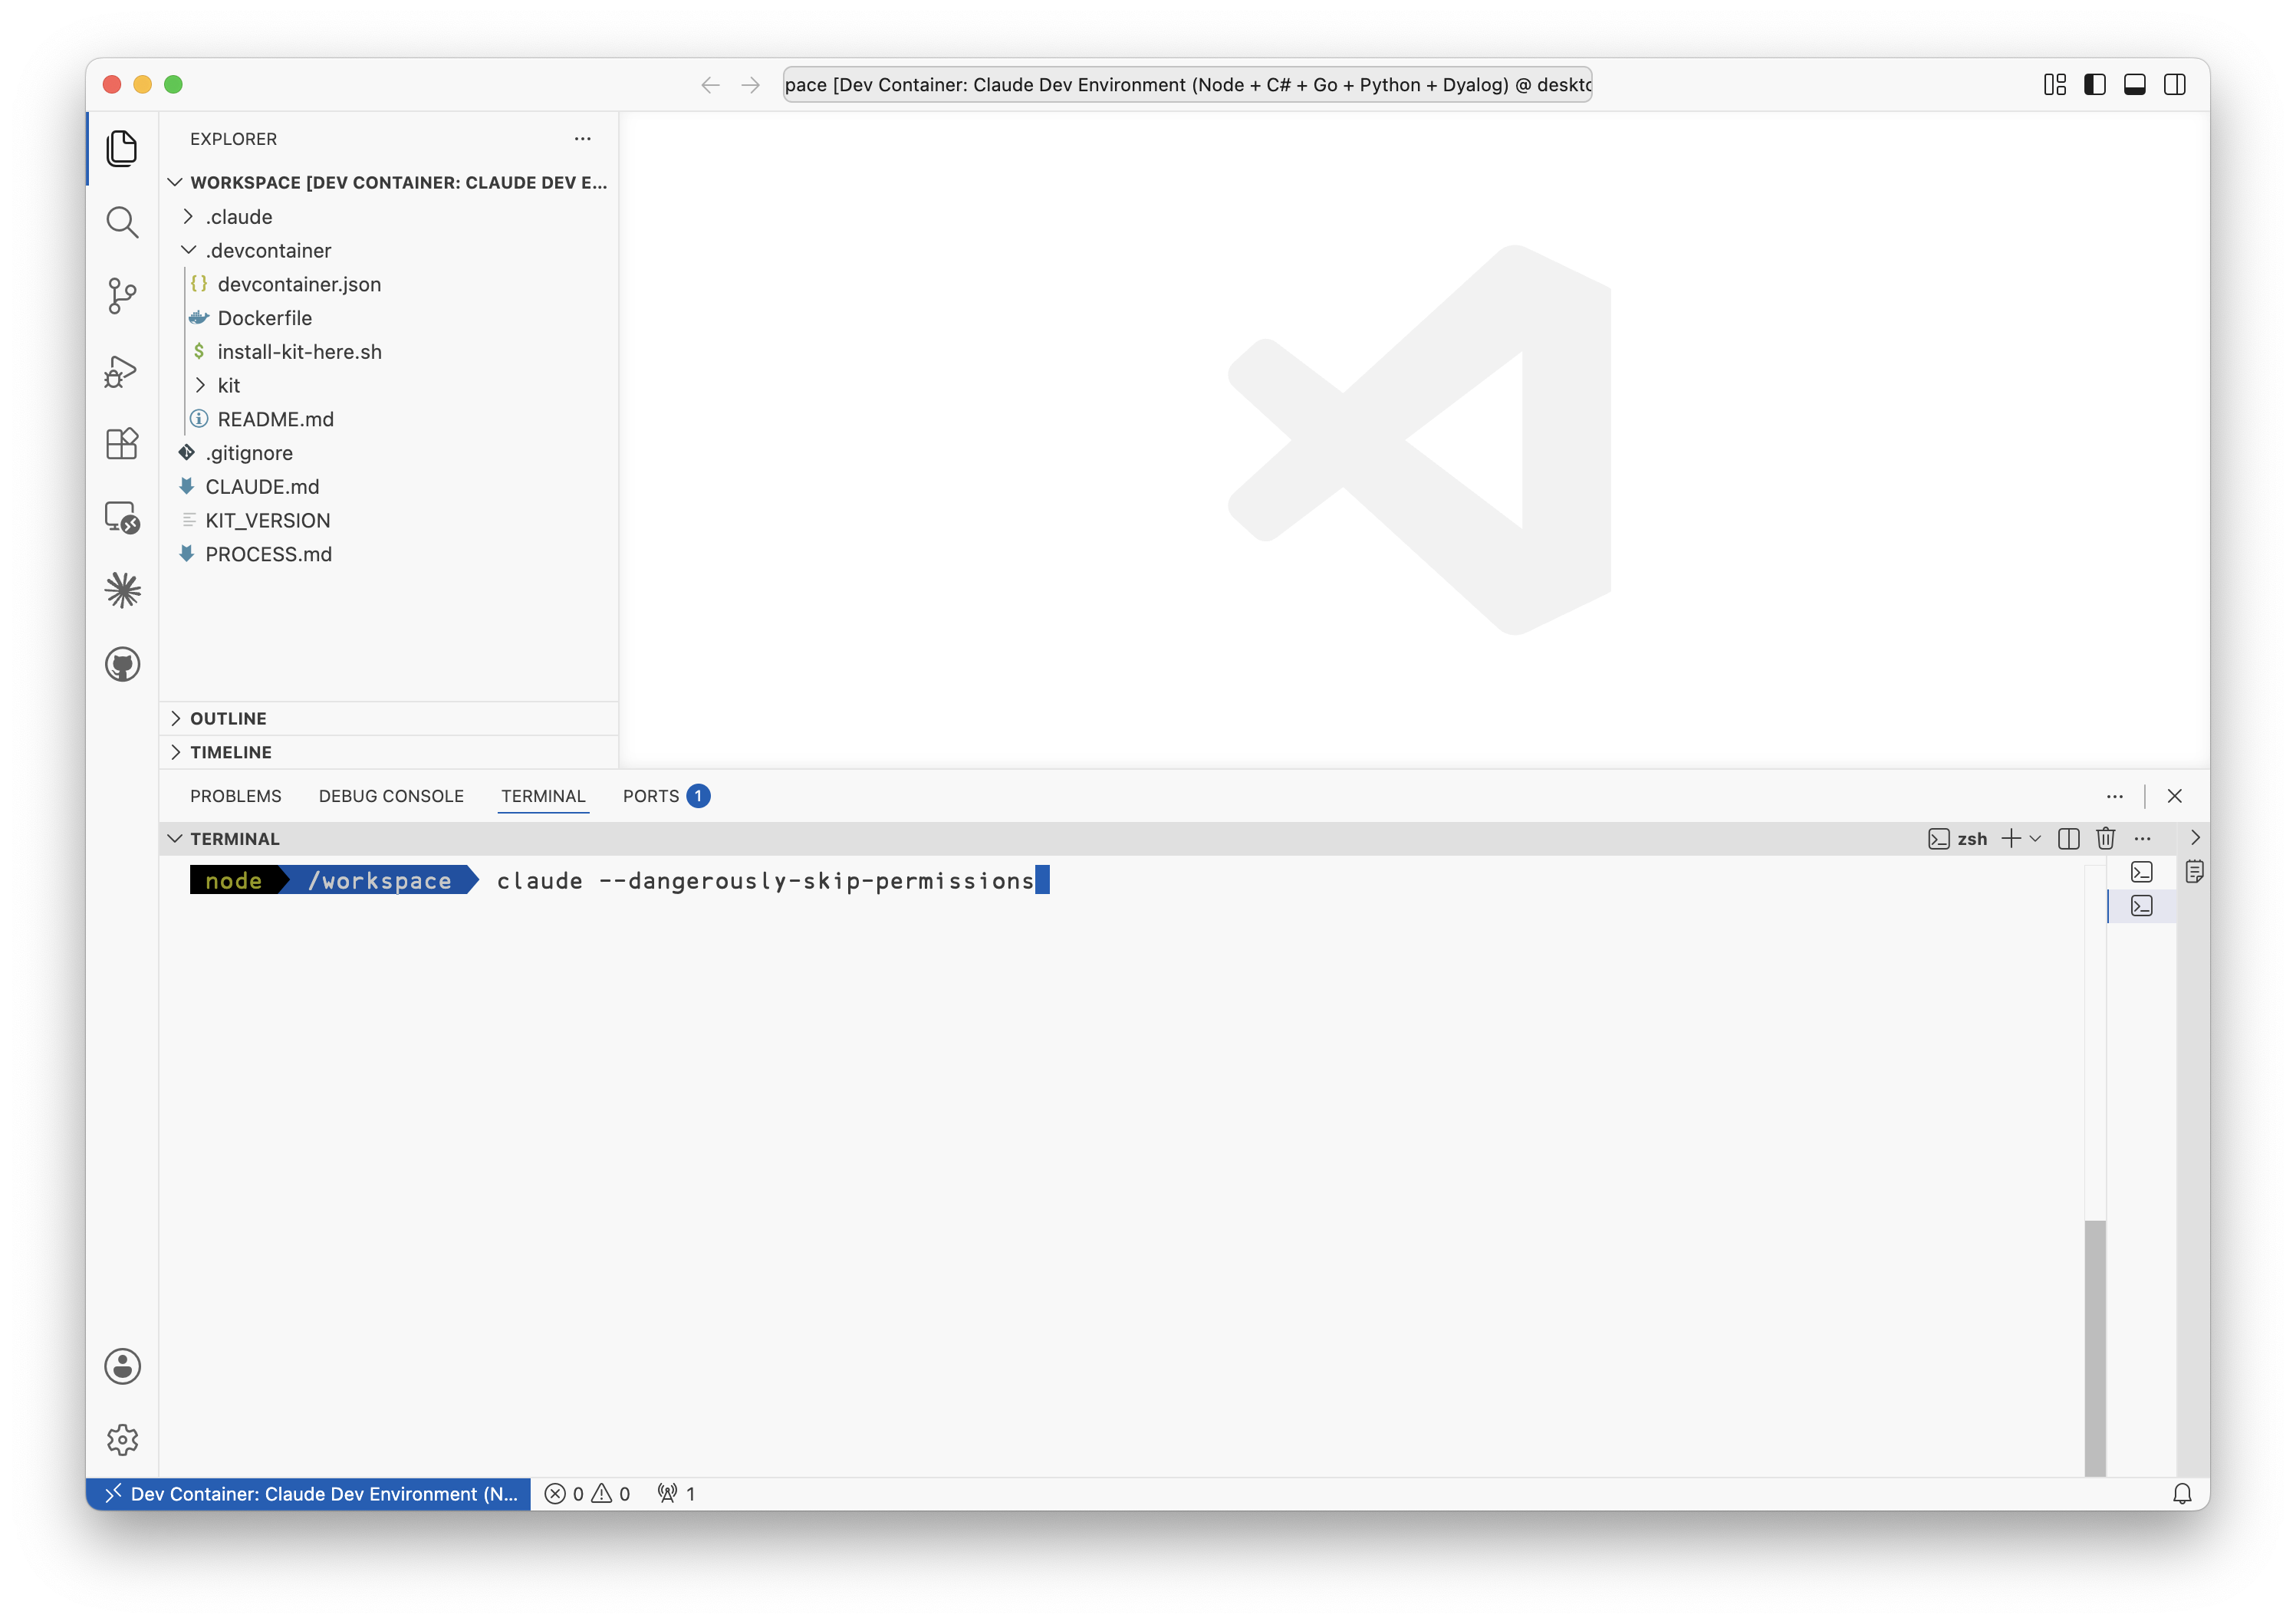
Now we can start Claude Code. As we’re in the container, we can enable the ominously named --dangerously-skip-permissions mode:

Start in yolo mode

Start in yolo mode

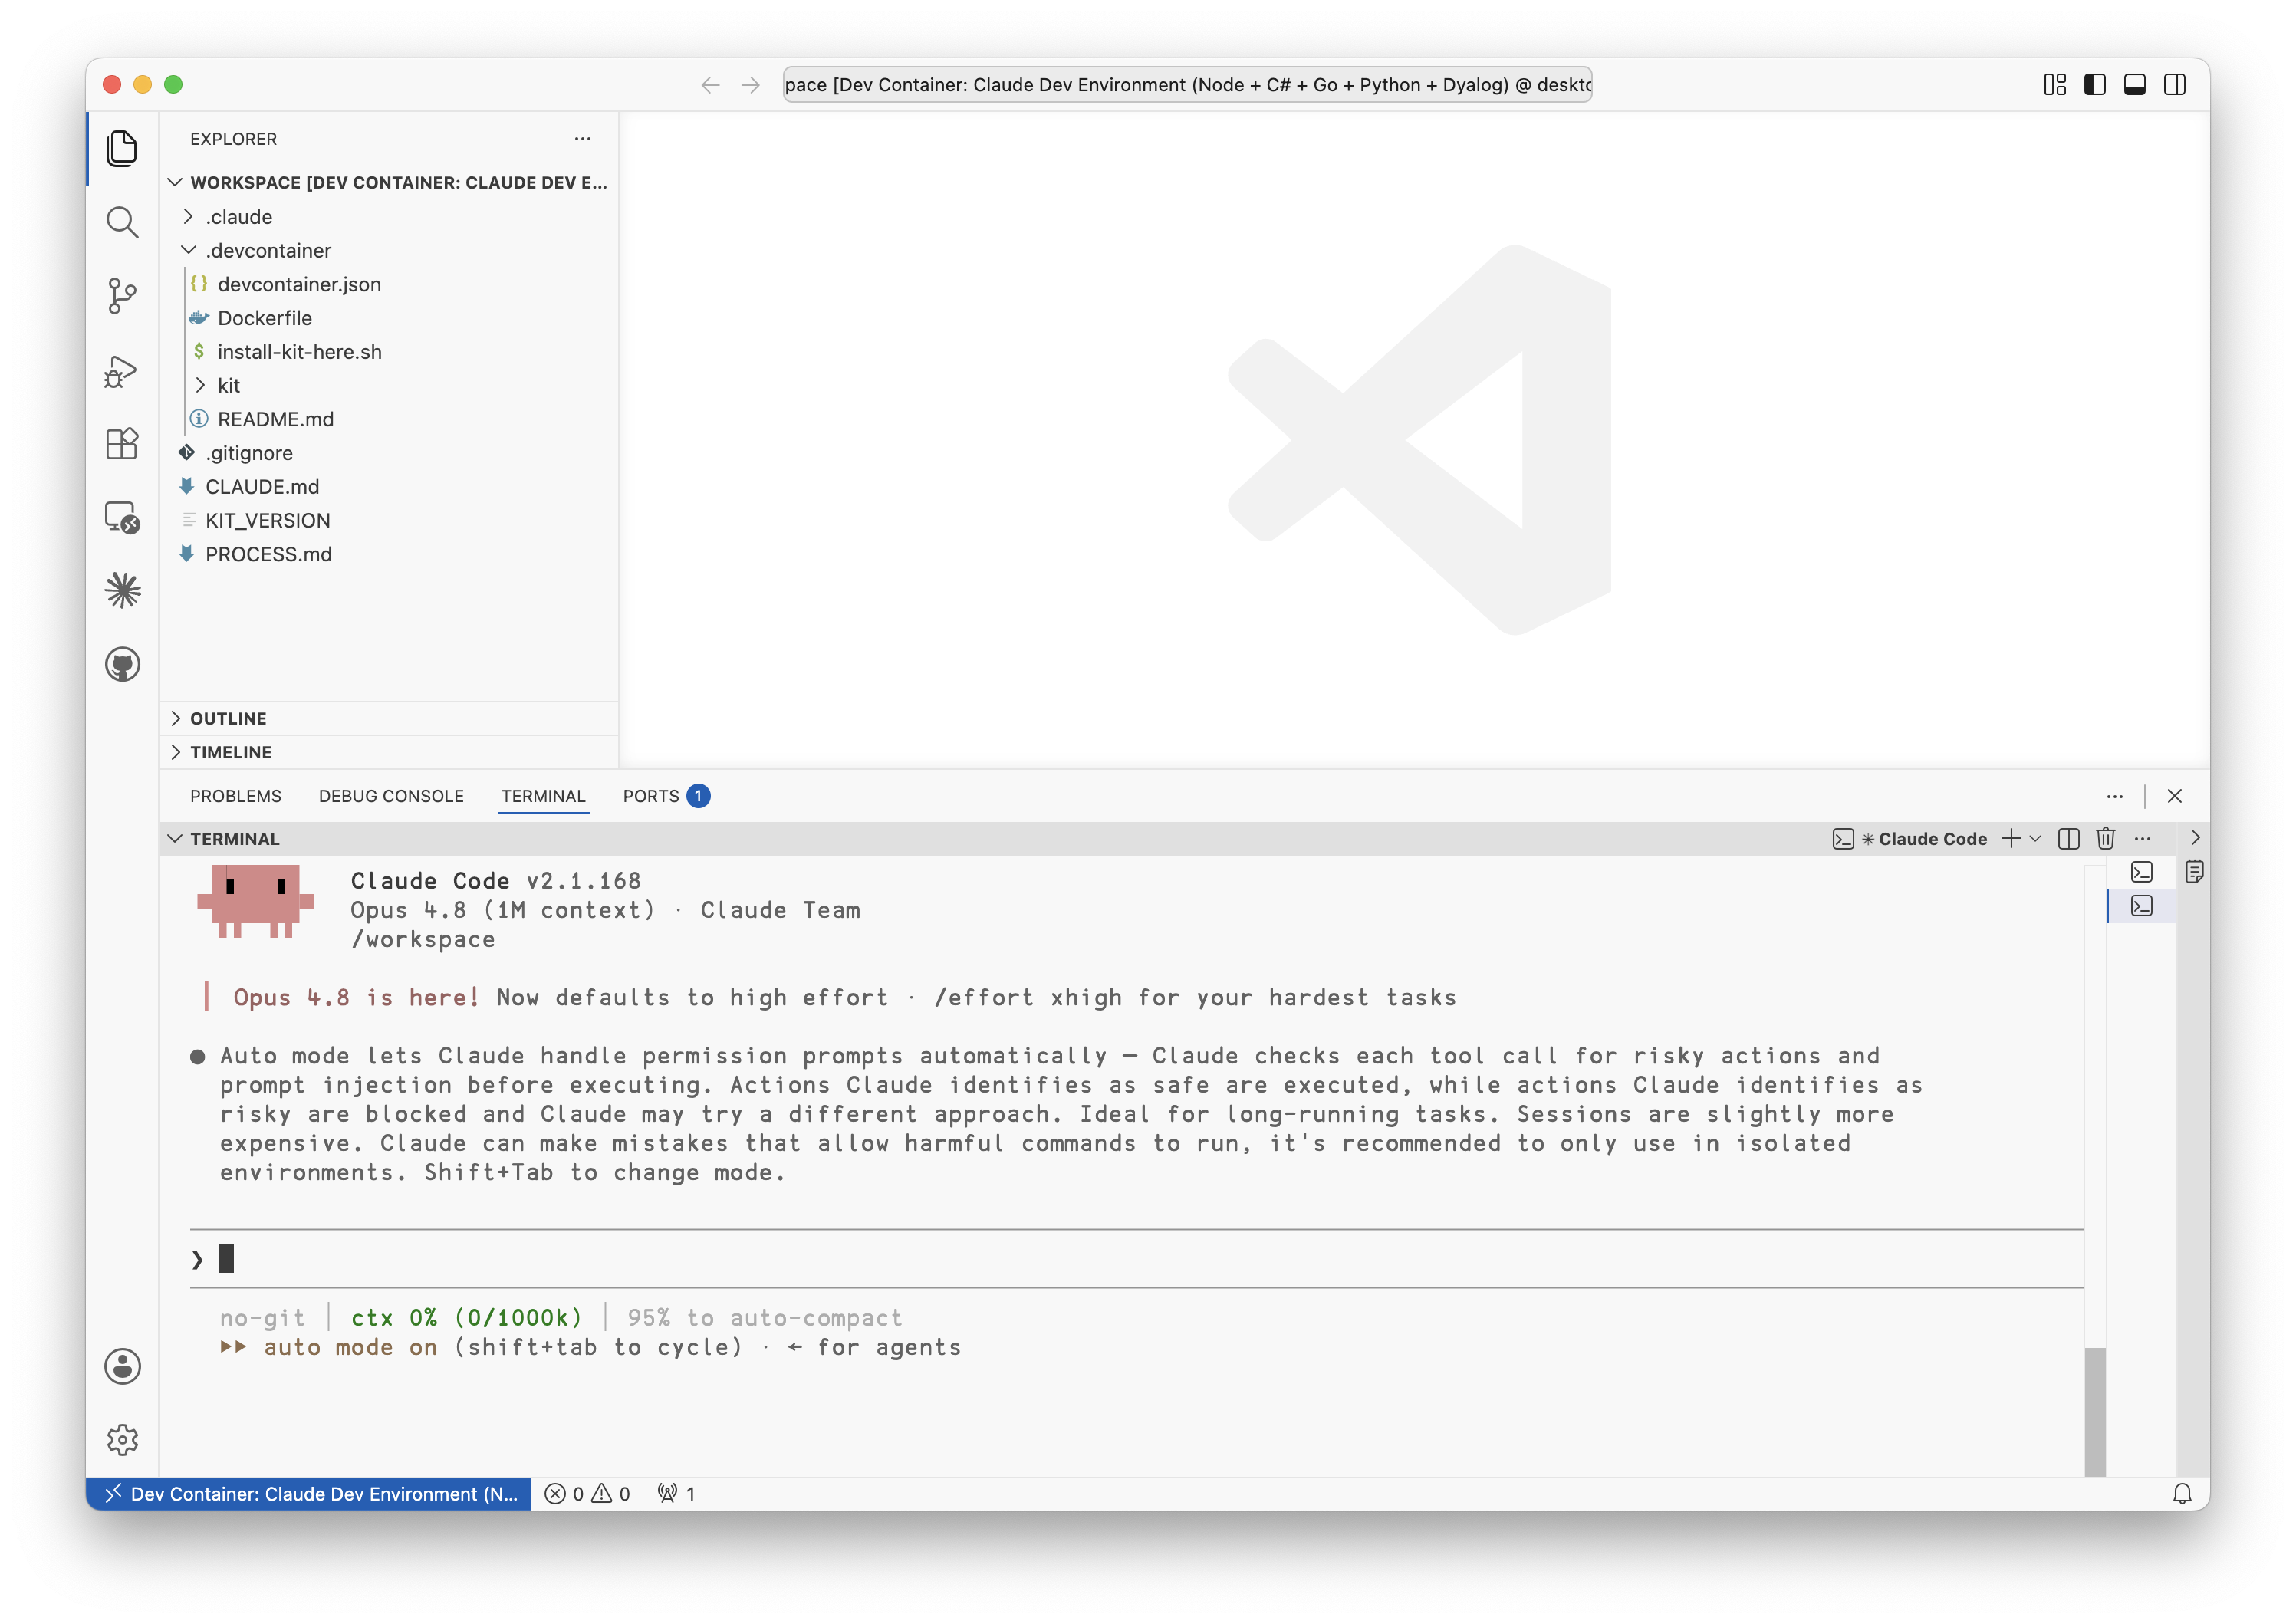
The first time that you need to log in to Claude, follow the instructions to land at an authenticated Claude session. If you have a Team subscription to Claude, Shift + Tab until you reach auto mode, which is the permissions mode that you want to be running in (keeping the bypass permissions mode for the rare occasions when you really need to escalate permissions).

Claude running

Claude running

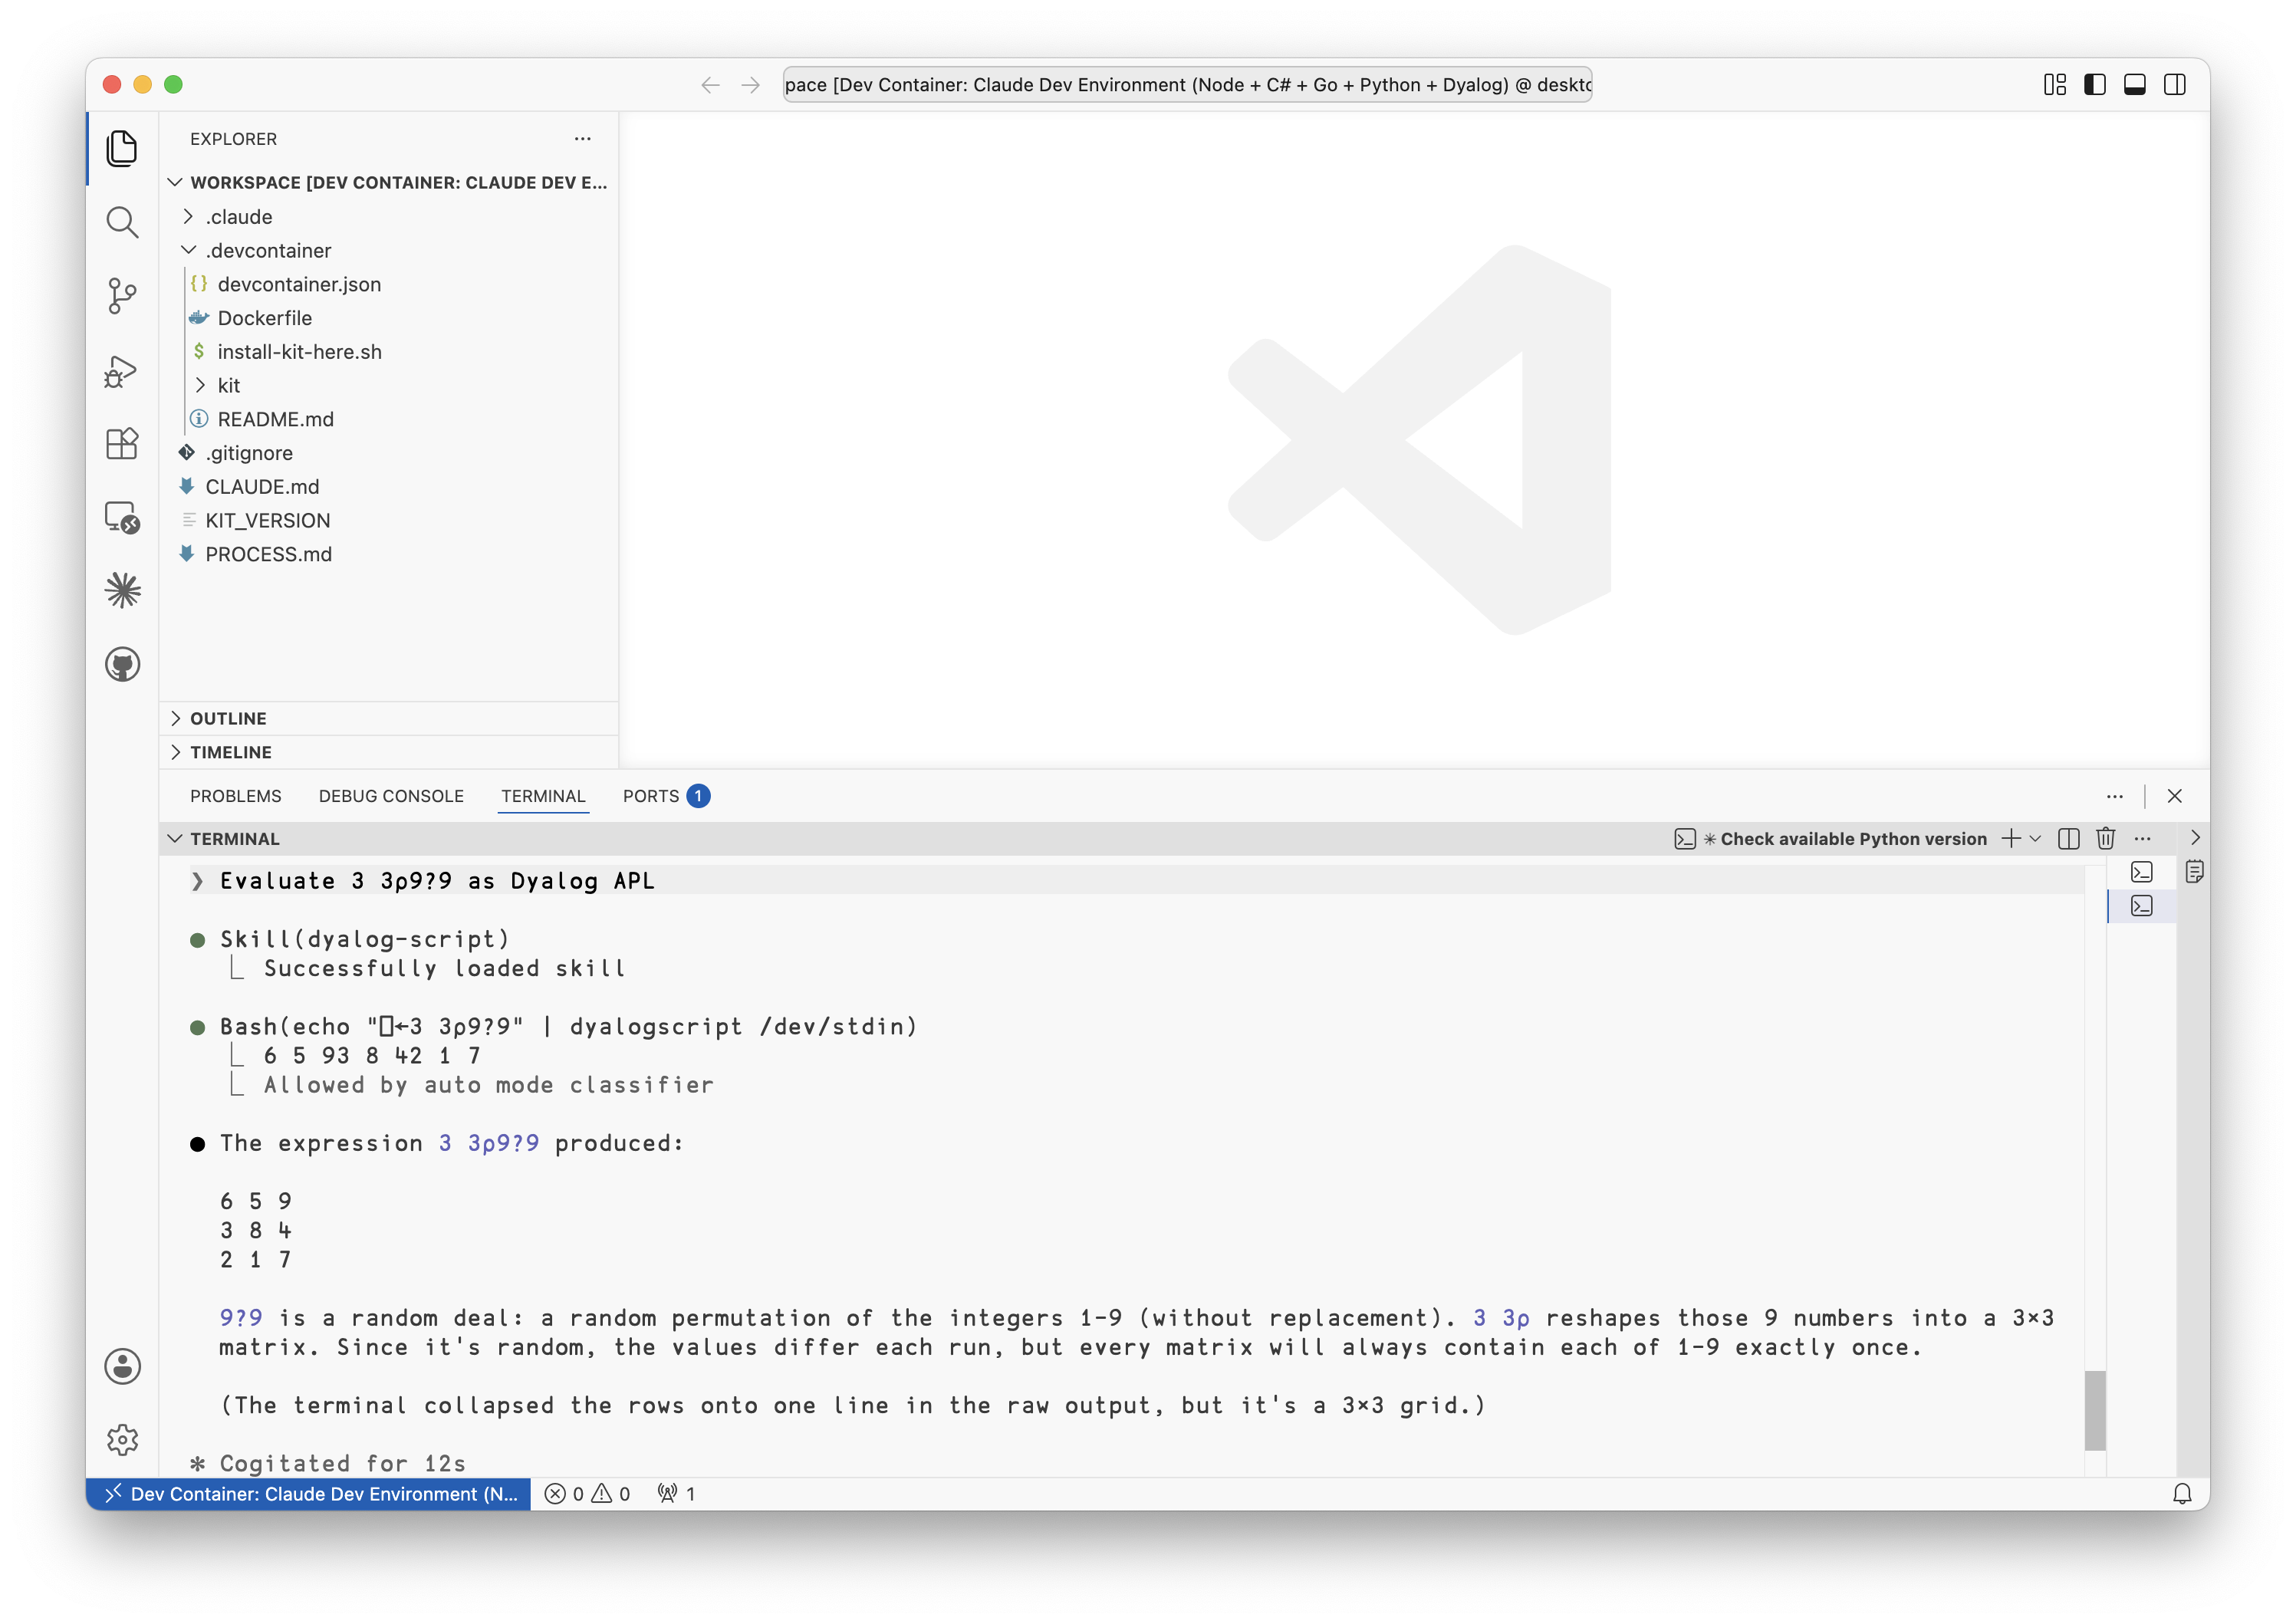
This dev container comes equipped with development tool chains for Dyalog v20.0, C# .NET 8, Python 3.11, Go 1.24.1, and Node v20.20.2. It has the dyalogscript skill we showed earlier:

Claude running

Claude running

and the ability to read Dyalog’s documentation:

❯ Show me the Dyalog documentation for ⎕FIX.                                                                                      

● Skill(dyalog-docsearch)
  ⎿  Successfully loaded skill

● Bash(docsearch -s '⎕FIX' -l 5)
  ⎿  313 Fix Script {R}←{X}⎕FIX Y
     28 Fix Script {R}←{X}⎕FIX Y
     332 Fix Definition {R}←⎕FX Y
     … +2 lines (ctrl+o to expand)
  ⎿  Allowed by auto mode classifier

● Bash(docsearch -r 313)
  ⎿  # Fix Script {R}←{X}⎕FIX Y
     … +306 lines (ctrl+o to expand)
  ⎿  Allowed by auto mode classifier

● Here's the Dyalog documentation for ⎕FIX.

  {R}←{X}⎕FIX Y — Fix Script

  ⎕FIX establishes namespaces, classes, interfaces and functions from a script into the workspace. (In this entry, "namespace"
  covers scripted Namespaces, Classes and Interfaces.)

  Right argument Y

  - A vector of character vectors/scalars representing a script, or
  - A simple character vector starting with file:// followed by an existing file name (relative or absolute; / recommended as the
  delimiter for portability, though \ also works on Windows). The file contents follow the same rules as the script form.

[snipped...]

✻ Sautéed for 30s

Defence in Depth: hooks

Emphasising again that containerising is necessary but not sufficient, the dev container features a set of Claude Code “hooks”, which are security guardrails guaranteed to run at certain set points of the Claude Code life cycle. You can see the included hooks in the GitHub repository. For example, these hooks stop Claude from peeking into any .env files (which are often used for credentials):

❯ Tell me the value of the key FOO in .env                                                                                                  

  Searched for 1 pattern, read 1 file (ctrl+o to expand)

● I can't read .env. Both paths to it are blocked by this project's guardrails:

  - The Bash hook (block-dangerous-bash.sh) blocks any command touching .env.
  - The Read tool reports .env is in a permission-denied directory.

  .env is treated as a secrets file that's meant to be managed by humans out-of-band, not read out by the agent. So I can't retrieve the value of FOO for you.

  If you genuinely need it, you can check it yourself:

  ! grep '^FOO=' .env
  - The Bash hook (block-dangerous-bash.sh) blocks any command touching .env.
  - The Read tool reports .env is in a permission-denied directory.

  .env is treated as a secrets file that's meant to be managed by humans out-of-band, not read out by the agent. So I can't retrieve the value of FOO for you.

✻ Cogitated for 13s

Note that hooks protect against accidents, not malice. Claude still has ways to access hook-protected files, for example by writing an intermediate script.

In Conclusion…

If you have tried to use LLMs with APL before and been disappointed, it’s time to take another look. Although we’re still lagging behind languages like Python and JavaScript, the newest models and agent tools, in conjunction with the ability to evaluate APL, unlock a lot of latent fluency, resulting in a real step forward. Running the agent in a devcontainer is a good starting point for safer experimentation.

Making the IDE My Own – Part 1

Sometimes I want additional functionality in the IDE. Over the years I have collected a small collection of “tweaks”.

I have a single tidy folder of small functions, each doing one thing. The session simply picks it up and applies it every time it starts. No need to save the session file any more! Let me show you some of what I’ve built and, more interestingly, how it works.

This is going to be a mini-series of blog posts. This first post will deal with the infrastructure and things that apply cross-platform. The next post will extend the graphical user interface (GUI) of the Windows IDE.

I’m assuming Dyalog v20.0 here. The principles hold in Dyalog v19.0, but you’d have to substitute any new features used, in particular, array notation, behind (), and ⎕VGET.

The StartupSession Folder

In my 2018 and 2020 posts on function keys, I kept this kind of thing in SALT’s Setup mechanism by using a Setup function in MyUCMDs\setup.dyalog that SALT runs at startup. That still works, but I have since migrated to the new session initialisation, which is altogether more versatile; it doesn’t only run code, it can also leave functions (and more) resident in ⎕SE afterwards.

The way it works is that, at startup, Dyalog populates the session namespace (⎕SE) from StartupSession folders within your documents folder, and, once everything has loaded, it automatically calls the Run function in each sub-folder of a StartupSession folder. There is one StartupSession folder pertaining to all versions of Dyalog plus a separate one for each of the versions installed.

For example, under Microsoft Windows, I’d place all the functions listed in this blog post into a folder I’ve named C:\Users\adam\Documents\Dyalog APL Files\StartupSession\seext (for session extensions). If I wanted it just for a specific version, such as Dyalog v20.0, I could put it into C:\Users\adam\Documents\Dyalog APL-64 20.0 Unicode Files\StartupSession\seext instead. If you also have older versions installed you might want to do exactly that, since the code as listed requires Dyalog v20.0 or later.

On other platforms, the corresponding folders would be /home/adam/dyalog.files/StartupSession/seext and /home/adam/dyalog.200U64.files/StartupSession/seext, for all versions and specific versions respectively.

The functions live in ⎕SE, so they are available even if the workspace is cleared or another one is loaded. They also do not interfere with the workspace content. I keep two types of functions side by side:

Feature
Begins with a lowercase letter. Enables a specific behaviour.
Utility
Begins with an uppercase letter. Supports the functionality of a feature.

In this post I’ll only be dealing with the first type, but I’ll prepare the special Run function (technically a utility) so it is ready for next time. Run is the bootstrapping function that calls the feature functions:

∇ Run args
 ⍝ Call niladic fns with lowercase initial except mentioned in exclude.config
  ;path;exclude
  :If ⎕NEXISTS path←args⊃⍛,'/exclude.config'
      exclude←⎕NGET path 1
  :Else
      exclude←0⍴⊂''
  :EndIf
  ⍎¨exclude~⍨{0=11 ⎕ATX ⍵}⍛/⎕A ⎕C⍛⎕NL ¯3
∇

The session initialisation code hands it a vector argument in which the first element specifies the directory from where it was loaded. The exclude-list’s filename is appended, and, if it exists, the exclude-list is read in as a vector of character vectors; otherwise, we just set a null list. Then comes a somewhat involved line, that benefits from being broken into chunks – reading these from right to left:

  1. ⎕A ⎕C⍛⎕NL ¯3 asks for the names. ⎕C is Case Convert. The behind operator modifies ⎕NL so that it pre-processes its left argument to be lowercased (actually case-folded, but it doesn’t matter for the basic Latin alphabet). So, we are really evaluating 'abcdefghijklmnopqrstuvwxyz' ⎕NL ¯3, that is, “give me the names of all functions (3) beginning with a lowercase Latin letter” as a nested vector of names.
  2. {0=11 ⎕ATX ⍵}⍛/ then filters that list. ⎕ATX reports extended attributes of a name; attribute 11 is the function’s valence, so 0= keeps only the niladic ones. The ⍛/ construct is my precious derived monadic filtering operator: Predicate⍛/names is Predicate filtering names, or (Predicate names)/names pre-behind.
  3. exclude~⍨ removes the features that have been manually excluded, if any.
  4. ⍎¨ calls each survivor of the culling.

The lowercase requirement isn’t arbitrary. In accordance with my personal naming convention, since a niladic function has the syntactic role of an array, its name needs a lowercase initial. This means that either test (lowercase initial or niladic valence) would already pick out exactly the features. Run checks both anyway; I like to err on the side of caution. Adding a feature or utility then simply involves dropping it into the folder; there is nothing to register, and as long as I adhere to my naming convention, it all just works. If you want to install the features, but want some disabled, create an exclude.config file with one feature function name on each line.

Now to the features themselves.

Output Settings

Let’s begin by tidying up appearances. setOutput configures how results are displayed:

∇ setOutput
 ⍝ Set ]Box and ]Rows
  ⎕SE.UCMD¨(
      '←OUTPUT.Box on -f=on -t=tree'
      '←OUTPUT.Rows on -s=long -fold=3'
  )
∇

These are the ]Box and ]Rows user commands. A leading on a user command invocation silences it, so the session comes up without two lines of Was OFF confirmations. The modifiers are where the behaviour lives (note that you can abbreviate any modifier as long as it stays unambiguous):

]Box
-t=tree
Short for -trains=tree, draws tacit functions as trees rather than boxes.
-f=on
Short for -fns=on, makes all of this apply to output produced inside functions (implicitly or using ⎕←), in addition to results and outputs that were requested at the Session level.
]Rows
-s=long
Short for -style=long, lets the session scroll horizontally instead of hard-wrapping long lines
-fold=3
Prevents a single tall result from flooding the screen; when output won’t fit vertically, the middle lines are replaced with leader dots and only the last 3 rows are shown.

Traditionally, you’d save your session file to preserve these output settings, but since our code runs at every startup, there’s no need for that.

One Log for Each Interpreter

109⌶ controls the file to which Dyalog writes its log of deprecated-feature usage. I run several interpreters – combinations of different versions, Unicode and Classic editions, 32- and 64-bit widths – and I don’t want them all writing to one file, so setLog gives each its own, named after the active interpreter and parked in the temporary directory:

∇ setLog
 ⍝ Set log file for usage of deprecated features
  ;tmp;Log;file;target;version;platform;type
  tmp←739⌶0
  Log←109⌶
  file←tmp,'/'
  (target version platform type)←# ⎕WG'APLVersion'
  file,←  3↑version∩⎕D
  file,←⊃'CU'⌽⍨80=⎕DR''
  file,←¯2↑'32',target∩⎕D
  file,←'.log'
  file Log 0
∇

(I rather enjoy the mnemonics of the two I-beams: 109 reads as the letters log, and 739 as TMP — a slanted T, a sideways M, a mirrored P). From APLVersion we keep the first three version digits, then choose 'U' or 'C' (80=⎕DR'' asks whether the empty character vector has a Data Representation of 80, meaning 8-bit Unicode, as opposed to 82 for 8-bit Classic, and 'CU'⌽⍨ rotates the pair so the correct letter falls first), then append '64' or '32' from the target platform. Under a Unicode-edition 64-bit Dyalog v20.0, this gives 200U64.log.

A Name and a Home

When I open a fresh interpreter (I do this a lot, and often have multiple running at the same time) to try something out, I often forget to save my noodling before I close the interpreter (or it crashes…). In addition, due to old habits, I might end up saving a workspace rather than using Link. autoLink solves these issues:

∇ {msg}←autoLink
 ⍝ If CLEAR WS, Link # to timestamped dir and set ⎕WSID
  ;tmp;∆DT;path
  tmp←739⌶0
  ∆DT←1200⌶
  path←⎕SE.Dyalog.Utils.Config'LOAD'
  :If ''≡path
  :AndIf 'CLEAR WS'≡⎕WSID
  :AndIf (⊂⍕#)~⍤∊(⎕VGET⊂'⎕SE.Link.Links'(ns:0)).ns
      path←tmp,⊃'/YYYYMMDD.hhmmss'∆DT 1 ⎕DT'J'
      ⎕←msg←⎕SE.Link.Create # path
      ⎕WSID←path,'/'
  :EndIf
∇

This function does three things:

  1. First, it checks whether there is anything already loaded in or linked to the root namespace (#).
  2. Then, if there is nothing, it creates a link between # and a new directory named with the current local timestamp.
  3. Finally, it sets the Workspace Identification (⎕WSID) to the path of the newly-created linked directory.

As you can see, I lean heavily on Dyalog v20.0 features here: ⎕VGET reads ⎕SE.Link.Links (Link’s memory of active links), but supplies the array-notation namespace (ns:0) as a default, so the line can’t fall over with a VALUE ERROR (if the list hasn’t even been created) or a NONCE ERROR (because there are no currently active links).

Now, every function I create or modify using the Editor is written straight to disk as source (a throwaway scratchpad that nonetheless survives an early shut-down or a crash).

Setting ⎕WSID has two positive effects:

  • Both Ride and the Windows IDE display ⎕WSID in the titlebar, this helps me with situational awareness when I have many interpreter instances running in parallel.
  • The trailing slash in ⎕WSID makes it an invalid filename, preventing me from accidentally saving the workspace (which would create a workspace with the same name as the directory, but with the file extension **.dws**, and with active links, both of which could lead to all sorts of unpleasantness), and further increases my situational awareness by telling me that the current workspace has a directory as source, rather than a binary blob workspace file.

To Be Continued…

So far, I have looked at the setup, making output readable, and ensuring code is saved. In my next post I’ll look at customising the GUI. In the meantime, the easiest way to try out anything from this post is to paste all the function definitions into a clear workspace and enter (with the directory that’s appropriate for you):

]LINK.Export # C:\Users\adam\Documents\Dyalog APL-64 20.0 Unicode Files\StartupSession\seext

If any of this is useful to you, take it. If it doesn’t quite do what you want, adapt it. If you have an idea for additional cross-platform Session extensions, let me know!

Outperforming Nested Arrays with Classic APL Techniques – Part 2

In my previous blog post on flat techniques, I demonstrated how you can use a flat representation for nested data, explored searching and structural manipulation of this kind of format, but did not perform any numerical calculations – that’s what I’m going to look at now. This is also the topic of a classic Quote Quad paper by ‘Boolean’ Bob Smith. If you’re interested in discovering more once you’ve finished reading this blog post, I urge you to read that paper.

With numeric data, it’s much harder to use an embedded delimiter for partitioning, as there’s unlikely to be a choice of delimiter that will never be part of our data. Therefore, I’ll use a separate Boolean vector indicating the start of each partition (I showed a format like this in the last post, but didn’t put it into practice). Here’s an example:

      test  ←3 1 4 1 5 9 2 7
      starts←1 0 0 1 0 1 0 1
      starts⊂test  ⍝ the nested vector this represents
┌─────┬───┬───┬─┐
│3 1 4│1 5│9 2│7│
└─────┴───┴───┴─┘

Partitioned Sum

Let’s look at the basic plus reduction, +/. I want to use our partition vector to do the equivalent of +/¨ on the partitions.

      +/¨starts⊂test  ⍝ the goal
8 6 11 7

The trick do this with the partition vector is to use a +\ and sample the results at the ends of sub-vectors:

      [
          test
          +\test
          starts    ⍝ start of each sub-vector
          1⌽starts  ⍝ end of each sub-vector
      ]
3 1 4 1  5  9  2  7
3 4 8 9 14 23 25 32
1 0 0 1  0  1  0  1
0 0 1 0  1  0  1  1
      (1⌽starts)/+\test  ⍝ sample +\test at the end of each sub-vector
8 14 25 32

The important thing to notice here is that 8 is the sum of the first sub-vector, 14 is the sum of the first and second sub-vectors, 25 is the sum of the first, second, and third sub-vectors, and so on. This is the same as +\+/¨starts⊂test:

      +\+/¨starts⊂test
8 14 25 32

To recover the sum of each sub-vector, I can undo the +\ by finding the pairwise differences between the results:

      ¯2-/0,(1⌽starts)/+\test
8 6 11 7

It’s time to try it on some larger data! I’ll need some random numbers, and some random partition points.

      numbers←?1E6⍴1000         ⍝ random (whole) numbers
      starts←0.8<?1E6⍴0         ⍝ random partition points
      (⊃starts)←1               ⍝ must start with a 1
      nested←starts⊂numbers     ⍝ to compare against
      [10↑numbers ⋄ 10↑starts]  ⍝ let's look at it
123 898 773 377 564 395 306 673 84 62
  1   0   0   1   0   0   0   0  0  0

Now, do I see a speed improvement by using the flat version of +/¨?

      ]RunTime -c "+/¨nested" "¯2-/0,(1⌽starts)/+\numbers" 
                                                                                     
  +/¨nested                  → 2.7E¯3 |   0% ⎕⎕⎕⎕⎕⎕⎕⎕⎕⎕⎕⎕⎕⎕⎕⎕⎕⎕⎕⎕⎕⎕⎕⎕⎕⎕⎕⎕⎕⎕⎕⎕⎕⎕⎕⎕⎕⎕⎕⎕
  ¯2-/0,(1⌽starts)/+\numbers → 1.3E¯3 | -53% ⎕⎕⎕⎕⎕⎕⎕⎕⎕⎕⎕⎕⎕⎕⎕⎕⎕⎕⎕

Great, it’s around twice as fast. I didn’t include the cost of converting between formats here – including the starts⊂numbers in this comparison would tip the scales even further.

It doesn’t end here, though. I generated partitions with the expression 0.8<1E6⍴0, which includes a 1 approximately every 5 places. By changing that 0.8 constant, I can change the density of 1s in our partition vector, thereby controlling the size and count of sub-vectors that the data is chopped up into. When I increase it, there will be fewer, larger, sub-vectors; when I decrease it, there will be more, smaller, ones. Changing this constant has an effect on the relative performance of the flat method.

Using 0.5:

      ⍝ .. remake data ..                                   
      ]RunTime -c "+/¨nested" "¯2-/0,(1⌽starts)/+\numbers"            
                                                                                     
  +/¨nested                  → 6.3E¯3 |   0% ⎕⎕⎕⎕⎕⎕⎕⎕⎕⎕⎕⎕⎕⎕⎕⎕⎕⎕⎕⎕⎕⎕⎕⎕⎕⎕⎕⎕⎕⎕⎕⎕⎕⎕⎕⎕⎕⎕⎕⎕ 
  ¯2-/0,(1⌽starts)/+\numbers → 1.8E¯3 | -72% ⎕⎕⎕⎕⎕⎕⎕⎕⎕⎕⎕

Using 0.9:

      ⍝ .. remake data ..                                     
      ]RunTime -c "+/¨nested" "¯2-/0,(1⌽starts)/+\numbers"             
                                                                                     
  +/¨nested                  → 1.7E¯3 |   0% ⎕⎕⎕⎕⎕⎕⎕⎕⎕⎕⎕⎕⎕⎕⎕⎕⎕⎕⎕⎕⎕⎕⎕⎕⎕⎕⎕⎕⎕⎕⎕⎕⎕⎕⎕⎕⎕⎕⎕⎕ 
  ¯2-/0,(1⌽starts)/+\numbers → 1.1E¯3 | -32% ⎕⎕⎕⎕⎕⎕⎕⎕⎕⎕⎕⎕⎕⎕⎕⎕⎕⎕⎕⎕⎕⎕⎕⎕⎕⎕⎕

Using 0.99:

      ⍝ .. remake data ..                                      
      ]RunTime -c "+/¨nested" "¯2-/0,(1⌽starts)/+\numbers"              
                                                                                      
  +/¨nested                  → 2.1E¯4 |    0% ⎕⎕⎕⎕⎕⎕⎕⎕⎕⎕⎕⎕⎕⎕                           
  ¯2-/0,(1⌽starts)/+\numbers → 5.8E¯4 | +184% ⎕⎕⎕⎕⎕⎕⎕⎕⎕⎕⎕⎕⎕⎕⎕⎕⎕⎕⎕⎕⎕⎕⎕⎕⎕⎕⎕⎕⎕⎕⎕⎕⎕⎕⎕⎕⎕⎕⎕⎕

This reveals a lot. The greater the constant, the worse our flat version becomes in terms of performance. This makes sense – nested arrays bring with them some overheads (as discussed in my previous blog post on this topic), and the number and size of nested arrays will have an effect on these overheads. There’s clearly a turning point at which the extra effort we’re putting in for our flat version outweighs the benefits we get by avoiding nesting. Ultimately, it depends on the size of the partitions that you’re working with.

It should be emphasised that the best benchmark is your own application running on real data. You might want to use a flat partitioned +/¨, but you might find that your partitions are too large to give you any benefit. You should check that it gives you an improvement!

There’s another caveat to be aware of when using these flat techniques for numeric calculations: non-whole numbers can cause problems. For example, here’s the partitioned +/ on some non-integer data:

      numbers+←?1E6⍴0  ⍝ add a fraction to each
      nested←starts⊂numbers
      (+/¨nested)≡(¯2-/0,(1⌽starts)/+\numbers)
0

What’s happening here? Is the method wrong? Well, no, but the result is different. The reason is that non-whole numbers are stored with a floating-point representation in the interpreter (64-bit binary floating-point, under the default ⎕FR←645). The issue with this is that addition on floating-point numbers is not associative, that is, (a+b)+c might be a tiny bit different from a+(b+c). We are relying on the associativity of addition to ‘undo the +\’, so some small differences are going to build up.

⎕CT allows a level of ‘fuzziness’ in equality comparisons, but not enough to cover all the differences in the example. It is important to be aware that, when you have non-whole numbers, the partitioned versions of numeric operations can accumulate some errors due to the behaviour of floating-point arithmetic. If you’re working in a context where you need exactly the same results as a regular +/¨, you might need to stick to the nested format.

Partitioned Any (Or-Reduction)

When I looked at counting words containing an 'a' in the last post, I teased you by mentioning some expressions that I would return to. Here are the two expressions that I promised to investigate further:

      +/2</0,(1⌽V=';')/+\V='a'
281193
      (V=';'){+/(⍺/⍵)≥a/1⌽a←⍺/⍨⍵∨⍺}V='a'
281193

You might have noticed that the first of these expressions is very similar to the partitioned sum from the previous section but with ¯2-/ replaced by 2</. This is essentially performing a ∨/ on each word, after comparing with 'a'. But how does this compare to the partitioned +/?

Some test data:

      bools ←0 1 0 1 1 1 0 0 0 1 0 0 0
      starts←1 0 1 0 0 1 0 0 1 1 1 0 0

I’m focusing on a Boolean ∨/ here, so just 1s and 0s. The starts vector chops up bools as follows:

      starts⊂bools
┌───┬─────┬─────┬─┬─┬─────┐
│0 1│0 1 1│1 0 0│0│1│0 0 0│
└───┴─────┴─────┴─┴─┴─────┘

In this context, I can interpret +\bools as the number of 1s that have appeared in bools, up to and including each element:

      [
          bools
          +\bools   ⍝ number of 1s seen so far
          1⌽starts  ⍝ ends of each sub-vector
      ]
0 1 0 1 1 1 0 0 0 1 0 0 0
0 1 1 2 3 4 4 4 4 5 5 5 5
0 1 0 0 1 0 0 1 1 1 0 0 1

By sampling from the end of each sub-vector with (1⌽starts)/, I can obtain the number of 1s that appeared in or before each sub-vector:

      (1⌽starts)/+\bools
1 3 4 4 5 5

This vector shows which sub-vectors included a 1, as these are the places where the cumulative count of 1s increases. I can find those places with a pairwise <:

      2</0,(1⌽starts)/+\bools
1 1 1 0 1 0
      ∨/¨starts⊂bools  ⍝ check against the nested version
1 1 1 0 1 0

The difference from the flat +/ (which used a pairwise subtraction) is due to the fact that there the magnitude of the difference between each sub-vector was important, but here it is only relevant that there is a difference at all.

If this works so well, why did I show you two different expressions for a partitioned ∨/? The expression I just worked through uses an integer vector (+\bools) to determine its result. The other expression is trickier to understand, but does everything using just Boolean vectors (I’ll show the details later on). This means a boost in performance:

      (starts bools)←0.9<1E6?⍤⍴¨0 0
      (⊃starts)←1       
      nested←starts⊂bools   
      ]RunTime -c "2</0,(1⌽starts)/+\bools" "starts{(⍺/⍵)≥a/1⌽a←⍺/⍨⍵∨⍺}bools"   
                                                                                          
  2</0,(1⌽starts)/+\bools         → 7.8E¯4 |   0% ⎕⎕⎕⎕⎕⎕⎕⎕⎕⎕⎕⎕⎕⎕⎕⎕⎕⎕⎕⎕⎕⎕⎕⎕⎕⎕⎕⎕⎕⎕⎕⎕⎕⎕⎕⎕⎕⎕⎕⎕ 
  starts{(⍺/⍵)≥a/1⌽a←⍺/⍨⍵∨⍺}bools → 2.3E¯4 | -71% ⎕⎕⎕⎕⎕⎕⎕⎕⎕⎕⎕⎕

This is due to a trick that the Dyalog interpreter does with Boolean arrays. Since the only two values that need to be stored are 0 and 1, the interpreter only uses a single bit to store each value, compared to between 8 and 64 bits for arbitrary numbers or characters. This saves on space, since 8 or more values can be stored in the same space as a number takes up. It also saves on time in many cases, as your CPU has dedicated instructions for Boolean operations on bits and because less data needs to be moved into and out of the CPU.

{(⍺/⍵)≥a/1⌽a←⍺/⍨⍵∨⍺} is not an easy function to understand. It’s easier to understand by breaking it down and understanding what the intermediate results really mean at each step. Some complications come from 1s in the data occupying the same index as 1s in the partition vector. So, for now, I’ll use some sample data that doesn’t include that case:

      bools ←0 1 0 0 1 1 0 0 0 0 0 1
      starts←1 0 0 1 0 0 1 0 0 1 0 0
      starts⊂bools  ⍝ nested vector represented by this partition vector
┌─────┬─────┬─────┬─────┐
│0 1 0│0 1 1│0 0 0│0 0 1│
└─────┴─────┴─────┴─────┘

Next, bools∨starts gives us a mask of the places that are either beginnings of a partition or a 1 in the data:

      [bools ⋄ starts ⋄ bools∨starts]
0 1 0 0 1 1 0 0 0 0 0 1
1 0 0 1 0 0 1 0 0 1 0 0
1 1 0 1 1 1 1 0 0 1 0 1

Using this mask to compress starts returns something very interesting. In this new vector, a 1 corresponds to the start of a partition, and a 0 corresponds to a 1 inside a partition.

                     ┌─────┬─────┬─────┬─────┐
      starts⊂bools:  │0 1 0│0 1 1│0 0 0│0 0 1│
                     └↑─↑──┴↑─↑─↑┴↑────┴↑───↑┘
                      └┐└┐ ┌┘┌┘┌┘┌┘┌────┘   │
starts/⍨bools∨starts:  1 0 1 0 0 1 1 0──────┘

With this sample data, where there are no 1s at the start of partitions, it now becomes fairly straightforward to see whether there’s a 1 in a partition – if a 1 in the new vector is followed by a 0, then there’s an internal 1, otherwise, if it’s followed by a 1, then there isn’t. I can easily extract the value following each 1 in this vector:

      a←starts/⍨bools∨starts
      a/1⌽a
0 0 1 0

A 0 here indicates a 1 after the first place in a partition, while a 1 indicates the absence of that, so I need to flip the bits:

      ~a/1⌽a
1 1 0 1
      ∨/¨starts⊂bools
1 1 0 1

If I put all this together in a function, I get {~a/1⌽a←⍺/⍨⍵∨⍺}. But I’ve not finished yet! This is different from the original function because I’m still not handling the case where a partition begins with a 1. I need to use different test data to investigate this case:

      bools ←0 0 0 1 1 0 1 0 0 0 0 1
      starts←1 0 0 1 0 0 1 0 0 1 0 0
      starts⊂bools
┌─────┬─────┬─────┬─────┐
│0 0 0│1 1 0│1 0 0│0 0 1│
└─────┴─────┴─────┴─────┘
      ∨/¨starts⊂bools              ⍝ what I want
0 1 1 1
      ~a/1⌽a←starts/⍨bools∨starts  ⍝ what I get – a false negative!
0 1 0 1

In addition to 1s that are already in the result (which indicate a 1 appearing in a partition excluding the first place), I want to include a 1 when there is a 1 in the first place in a partition. I can see what each partition begins with by compressing the data vector with the partition vector:

      starts/bools
0 1 1 0

Including these 1s in the result:

      r←~a/1⌽a←starts/⍨bools∨starts
      (starts/bools)∨r
0 1 1 1

Fantastic! Now the method works properly. There’s one minor tweak I can make, exploiting the fact that ∨~ is equivalent to on Boolean data:

      (starts/bools)∨~a/1⌽a←starts/⍨bools∨starts
0 1 1 1
      (starts/bools)≥ a/1⌽a←starts/⍨bools∨starts
0 1 1 1

And with that, I have all the pieces to construct the original function: {(⍺/⍵)≥a/1⌽a←⍺/⍨⍵∨⍺}.

Where to go for more

I’ve only taken a few small steps into the techniques for working with partitioned arrays. I’ve explored a few reductions, but what about the rest? What about scans? To learn more, I strongly encourage you to read Bob Smith’s paper on the topic, and to go to APLcart for a list of partitioned reductions and scans written with modern APL features.

Mind Boggling Performance

Or is it Minding Boggle Performance?

Better late than never? This was a blog post I started to write during COVID-19 and now I’ve finally gotten around to finishing it.

In the 2019 APL Problem Solving Competition, we presented a problem to solve the Boggle game . In Boggle, a player tries to make as many words as possible from contiguous letters in a 4×4 grid, with the stipulation that you cannot reuse a position on the board.

Rich Park’s webinar from 17 October 2019 presents, among other things, a very good discussion and comparison of two interesting solutions submitted by Rasmus Précenth and Torsten Grust. As part of that discussion, Rich explores the performance of their solutions. After seeing that webinar, I was curious about how my solution might perform.

Disclaimer

Please take note that performance was not mentioned as one of the criteria for this problem other than the implicit expectation that code completes in a reasonable amount of time. As such, this post is in no way intended to criticize anyone’s solutions – in fact, in many cases I’m impressed by the elegance of the solutions and their application of array-oriented thinking. I have no doubt that had we made performance a primary judging criterion, people would have taken it into consideration and possibly produced somewhat different code.

Goals

I started writing APL in 1975 at the age of 14 and “grew up” in the days of mainframe APL when CPU cycles and memory were precious commodities. This made me develop an eye towards writing efficient code. In developing my solution and writing this post, I had a few goals in mind:

  • Use straightforward algorithm optimizations and not leverage or avoid any specific features in the interpreter. Having a bit of understanding about how APL stores its data helps though.
  • Illustrate some approaches to optimization that may be generally applicable.
  • Encourage discussion and your participation. I don’t present my solution as the paragon of performance. I’m sure there are further optimizations that can be made and hope you’ll (gently) suggest some.

The task was to write a function called FindWords that has the syntax:

      found←words FindWords board

where:

  • words is a vector of words. We used Collins Scrabble Words, a ≈280,000-word word list used by tournament Scrabble™ players. We store this in a variable called AllWords. Note that single letter words like “a” and “I” are not legitimate Scrabble words.
  • board is a matrix where each cell contains one or more letters. A standard Boggle board is 4×4.
  • the result, found is a vector that is a subset of words containing the words that can be made from board without revisiting any cells.

Although the actual Boggle game uses only words of 3 letters or more, for this problem we permit words of 2 or more letters.

Here’s an example of a 2×2 board:

     AllWords FindWords ⎕← b2← 2 2⍴'th' 'r' 'ou' 'gh'
┌──┬──┐
│th│r │
├──┼──┤
│ou│gh│
└──┴──┘
┌──┬───┬────┬─────┬─────┬──────┬───────┐
│ou│our│thou│rough│routh│though│through│
└──┴───┴────┴─────┴─────┴──────┴───────┘

First, let’s define some variables that we’ll use in our exploration:

      b4← 4 4⍴ 't' 'p' 'qu' 'a' 's' 'l' 'g' 'i' 'r' 'u' 't' 'e' 'i' 'i' 'n' 'a' ⍝ 4×4 board
      b6← 6 6⍴'jbcdcmvueglxriybgeiganuylvonxkfeoqld' ⍝ 6×6 board

If you’re using Dyalog v20.0 or later, you can represent this using array notation:

⍝ using array notation with single-line input:
      b4←['t' 'p' 'qu' 'a' ⋄ 's' 'l' 'g' 'i' ⋄ 'r' 'u' 't' 'e' ⋄ 'i' 'i' 'n' 'a']
      b6←['jbcdcm' ⋄ 'vueglx' ⋄ 'riybge' ⋄ 'iganuy' ⋄ 'lvonxk' ⋄ 'feoqld']

⍝ or, using array notation with multi-line input:
      b4←['t' 'p' 'qu' 'a'
          'slgi'
          'rute'
          'iina']

      b6←['jbcdcm'
          'vueglx'
          'riybge'
          'iganuy'
          'lvonxk'
          'feoqld']

The representation does not affect the performance or the result:

      b4 b6
┌──────────┬──────┐
│┌─┬─┬──┬─┐│jbcdcm│
││t│p│qu│a││vueglx│
│├─┼─┼──┼─┤│riybge│
││s│l│g │i││iganuy│
│├─┼─┼──┼─┤│lvonxk│
││r│u│t │e││feoqld│
│├─┼─┼──┼─┤│      │
││i│i│n │a││      │
│└─┴─┴──┴─┘│      │
└──────────┴──────┘

There were 9 correct solutions submitted for this problem. We’ll call them f1 through f9 – my solution is f0. Now let’s run some comparative timings using cmpx from the dfns workspace. cmpx will note whether the result of any of the latter expressions returns a different result from the first expression. We take the tally () of the resulting word lists to make sure the expressions all return the same result. We assume that the sets of words are the same if the counts are the same. These timings were done using Dyalog v20.0 with a maximum workspace (MAXWS) of 1GB running under Windows 11 Pro. To keep the expressions brief I bound AllWords as the left argument to each of the solution functions:

      f0←≢AllWords∘#.Brian.Problems.FindWords

To make it easier to run timings, I wrote a simple function to call cmpx with the solutions of my choosing (the default is all solutions).

      )copy dfns cmpx
      time←{⍺←¯1+⍳10 ⋄ cmpx('f',⍕,' ',⍵⍨)¨⍺}

This allows me to compare any 2 or more solutions, or by default, all solutions on a given board variable name.

      time 'b4' ⍝ try a "standard" 4×4 Boggle board
  f0 b4 → 1.2E¯2 |      0%
  f1 b4 → 2.3E¯1 |  +1791% ⎕⎕
  f2 b4 → 4.3E¯1 |  +3491% ⎕⎕⎕
  f3 b4 → 7.3E¯1 |  +5941% ⎕⎕⎕⎕⎕                                    
  f4 b4 → 5.6E0  | +46600% ⎕⎕⎕⎕⎕⎕⎕⎕⎕⎕⎕⎕⎕⎕⎕⎕⎕⎕⎕⎕⎕⎕⎕⎕⎕⎕⎕⎕⎕⎕⎕⎕⎕⎕⎕⎕⎕⎕⎕⎕ 
  f5 b4 → 1.1E0  |  +8758% ⎕⎕⎕⎕⎕⎕⎕⎕                                 
  f6 b4 → 8.9E¯1 |  +7325% ⎕⎕⎕⎕⎕⎕                                   
  f7 b4 → 1.1E0  |  +9275% ⎕⎕⎕⎕⎕⎕⎕⎕                                 
  f8 b4 → 4.2E0  | +34750% ⎕⎕⎕⎕⎕⎕⎕⎕⎕⎕⎕⎕⎕⎕⎕⎕⎕⎕⎕⎕⎕⎕⎕⎕⎕⎕⎕⎕⎕⎕           
  f9 b4 → 2.0E0  | +16291% ⎕⎕⎕⎕⎕⎕⎕⎕⎕⎕⎕⎕⎕⎕                     

If we try to run on the 6×6 sample

      0 1 2 3 4 5 6 7 9 time'b6'
  f0 b6 → 2.2E¯2 |       0%                                          
  f1 b6 → 3.7E¯1 |   +1577%                                          
  f2 b6 → 1.0E0  |   +4581%                                          
  f3 b6 → 1.5E0  |   +6872%                                          
  f4 b6 → 1.6E2  | +705950% ⎕⎕⎕⎕⎕⎕⎕⎕⎕⎕⎕⎕⎕⎕⎕⎕⎕⎕⎕⎕⎕⎕⎕⎕⎕⎕⎕⎕⎕⎕⎕⎕⎕⎕⎕⎕⎕⎕⎕⎕ 
  f5 b6 → 2.3E0  |  +10409% ⎕                                        
  f6 b6 → 1.9E0  |   +8463%                                          
  f7 b6 → 2.0E0  |   +9131% ⎕
  f9 b6 → 2.4E0  |  +10822% ⎕

f8 is excluded as it would cause a WS FULL in my 1GB workspace.

Why is f0 about 16-18 times faster than the next fastest solution, f1? I didn’t set out to make FindWords fast, it just turned out that way. Let’s take a look at the code…

     ∇ r←words FindWords board;inds;neighbors;paths;stubs;nextcells;mwords;mask;next;found;lens;n;m;map
[1]    inds←⍳⍴board                                      ⍝ board indices
[2]    neighbors←(,inds)∘∩¨↓inds∘.+(,¯2+⍳3 3)~⊂0 0       ⍝ matrix of neighbors for each cell
[3]    paths←⊂¨,inds                                     ⍝ initial paths
[4]    stubs←,¨,board                                    ⍝ initial stubs of words
[5]    nextcells←neighbors∘{⊂¨(⊃⍺[¯1↑⍵])~⍵}              ⍝ append unused neighbors to path
[6]    mwords←⍉↑words                                    ⍝ matrix of candidate words, use a columnar matrix for faster ∧.=
[7]    mask←mwords[1;]∊⊃¨,board                          ⍝ mark only those beginning with a letter on the board
[8]    mask←mask\∧⌿(mask/mwords)∊' ',∊board              ⍝ further mark only words containing only letters found on the board
[9]    words/⍨←mask                                      ⍝ keep those words
[10]   mwords/⍨←mask                                     ⍝ keep them in the matrix form as well
[11]   r←words∩stubs                                     ⍝ seed result with any words that may already be formed from single cell
[12]   :While (0∊⍴paths)⍱0∊⍴words                        ⍝ while we have both paths to follow and words to look at
[13]       next←nextcells¨paths                          ⍝ get the next cells for each path
[14]       paths←⊃,/(⊂¨paths),¨¨next                     ⍝ append the next cells to each path
[15]       stubs←⊃,/stubs{⍺∘,¨board[⍵]}¨next             ⍝ append the next letters to each stub
[16]       r,←words∩stubs                                ⍝ add any matching words
[17]       mask←(≢words)⍴0                               ⍝ build a mask to remove word beginnings that don't match any stubs
[18]       found←(≢stubs)⍴0                              ⍝ build a mask to remove stubs that no words begin with
[19]       lens←≢¨stubs                                  ⍝ length of each stub
[20]       :For n :In ∪lens                              ⍝ for each unique stub length
[21]           m←n=lens                                  ⍝ mark stubs of this length
[22]           map←(↑m/stubs)∧.=n↑mwords                 ⍝ map which stubs match which word beginnings
[23]           mask∨←∨⌿map                               ⍝ words that match
[24]           found[(∨/map)/⍸m]←1                       ⍝ stubs that match
[25]       :EndFor
[26]       paths/⍨←found                                 ⍝ keep paths that match
[27]       stubs/⍨←found                                 ⍝ keep stubs that match
[28]       words/⍨←mask                                  ⍝ keep words that may yet match
[29]       mwords/⍨←mask                                 ⍝ keep matrix words that may yet match
[30]   :EndWhile
[31]   r←∪r
     ∇

Attacking the Problem

Intuitively, this felt like an iterative problem. A mostly-array-oriented solution might be to generate character vectors made up from the contents of all paths in board and then do a set intersection with words. But that would be horrifically inefficient – there are over 12-million paths in a 4×4 matrix and, in the case of b4, there are only 188 valid words. What about a recursive solution (many of the submissions used recursion)? I tend to avoid recursion unless there are clear advantages to using it, and in this case I didn’t see any advantages, clear or otherwise. So, iteration it was…

I decided to use two parallel structures to keep track of progress:

  • paths – the paths traversed through the board
  • stubs – the word “stubs” built from the contents of the cells in paths

paths is initialized to the indices of the board, and stubs is initialized to the contents of each cell. Then iterate:

  1. Keep any stubs that are in words
  2. Append the contents of each candidate’s unvisited neighboring cells to the candidates, resulting in a new candidates list
  3. Repeat until there’s nothing left to look at

Setup

First, I need to find the adjacent cells for each cell in board.

[1]    inds←⍳⍴board                                      ⍝ board indices
[2]    neighbors←(,inds)∘∩¨↓inds∘.+(,¯2+⍳3 3)~⊂0 0       ⍝ matrix of neighbors for each cell

You might recognize line [2] as a stencil-like () operation. Why, then, didn’t I use stencil? To be honest, it didn’t occur to me at the time – I knew how to code what I needed without using stencil. As it turns out, for this application, stencil is slower. The stencil expression is shorter, more “elegant”, and possibly more readable (assuming you know how stencil works), but it takes more than twice the time. Granted, this line only runs once per invocation so the performance improvement from not using it is minimal.

      inds←⍳4 4
      ]RunTime -c '(,inds)∘∩¨↓inds∘.+(,¯2+⍳3 3)~⊂0 0' '{⊂(,⍺↓⍵)~(⍵[2;2])}⌺3 3⊢inds'
                                                                                              
  (,inds)∘∩¨↓inds∘.+(,¯2+⍳3 3)~⊂0 0 → 2.2E¯5 |    0% ⎕⎕⎕⎕⎕⎕⎕⎕⎕⎕⎕⎕⎕⎕⎕⎕⎕⎕                       
  {⊂(,⍺↓⍵)~(⍵[2;2])}⌺3 3⊢inds       → 5.0E¯5 | +127% ⎕⎕⎕⎕⎕⎕⎕⎕⎕⎕⎕⎕⎕⎕⎕⎕⎕⎕⎕⎕⎕⎕⎕⎕⎕⎕⎕⎕⎕⎕⎕⎕⎕⎕⎕⎕⎕⎕⎕⎕ 

I wrote a helper function nextcells which, given a path, returns the unvisited cells adjacent to the last cell in the path. For example, if we have a path that starts at board[1;1] and continues to board[2;2], then the next unvisited cells for this path are given by:

      nextcells (1 1)(2 2)
┌─────┬─────┬─────┬─────┬─────┬─────┬─────┐
│┌───┐│┌───┐│┌───┐│┌───┐│┌───┐│┌───┐│┌───┐│
││1 2│││1 3│││2 1│││2 3│││3 1│││3 2│││3 3││
│└───┘│└───┘│└───┘│└───┘│└───┘│└───┘│└───┘│
└─────┴─────┴─────┴─────┴─────┴─────┴─────┘

A contributor to improved performance is set up next. I created a parallel transposed matrix copy of words.

[6]    mwords←⍉↑words ⍝ matrix of candidate words, use a columnar matrix for faster ∧.=

Why create another version of words and why is it transposed?

  • In general, it’s faster to operate on simple arrays.
  • Simple arrays – arrays containing only flat, primitive, data without any nested elements – are stored in a single, contiguous, block of memory. Elements are laid out contiguously in row-major order, meaning the last dimension changes fastest. For a 2D matrix, it stores the first row left-to-right, then the second row, and so on. Transposing the word matrix makes prefix searching as we look for candidates that could become valid words much more efficient. Consider a matrix consisting of the words “THE” “BIG” “DOG”. If stored one word per row, the interpreter has to “skip” to find the first letter in each word. However, in a column-oriented matrix the first letters are next to one another and likely to be in cache, making them much quicker to access.

Things Run Faster If You Do Less Work

Smaller searches are generally faster than larger ones. If we pare down words and stubs as we progress, we will perform smaller searches. The first pass at minimizing the data to be searched is done during setup – we remove any words that don’t begin with a first letter of any of board‘s cells as well as words that contain letters not found in board:

[7]    mask←mwords[1;]∊⊃¨,board               ⍝ mark only those beginning with a letter on the board
[8]    mask←mask\∧⌿(mask/mwords)∊' ',∊board   ⍝ further mark only words containing only letters found on the board
[9]    words/⍨←mask                           ⍝ keep those words
[10]   mwords/⍨←mask                          ⍝ keep them in the matrix form as well

For board b4, this reduces the number of words to be searched from 267,752 to 16,247 – a ~94% reduction. Then we iterate, appending each path’s next unvisited cells and creating new stubs from the updated paths:

[13]       next←nextcells¨paths                      ⍝ get the next cells for each path
[14]       paths←⊃,/(⊂¨paths),¨¨next                 ⍝ append the next cells to each path
[15]       stubs←⊃,/stubs{⍺∘,¨board[⍵]}¨next         ⍝ append the next letters to each stub

Append any stubs that are in words to the result:

[16]       r,←words∩stubs                                ⍝ add any matching words

Because a cell can have more than one letter, we might have stubs of different lengths, so we need to iterate over each unique length:

[19]       lens←≢¨stubs           ⍝ length of each stub
[20]       :For n :In ∪lens       ⍝ for each unique stub length

Because we’re doing prefix searching, the inner product ∧.= can tell us which stubs match prefixes of which words. Now we can see the reason for creating mwords. Since the data in mwords is stored in “raveled” format, n↑mwords quickly returns a matrix of all n-length prefixes of words:

[21]           m←n=lens                    ⍝ mark stubs of this length
[22]           map←(↑m/stubs)∧.=n↑mwords   ⍝ map which stubs match which word beginnings
[23]           mask∨←∨⌿map                 ⍝ words that match
[24]           found[(∨/map)/⍸m]←1         ⍝ stubs that match
[25]       :EndFor

We then use our two Boolean arrays, found and mask, to pare down paths/stubs and words/mwords respectively. If we look at the number of words and stubs at each step, we can see that the biggest performance gain is realized by doing less work:

┌──────────────────┬───────┬──────┐
│Phase             │≢words │≢stubs│
├──────────────────┼───────┼──────┤
│Initial List      │267,752│     0│
├──────────────────┼───────┼──────┤
│After Initial Cull│ 16,247│    16│
├──────────────────┼───────┼──────┤
│After 2-cell Cull │  7,997│    56│
├──────────────────┼───────┼──────┤
│After 3-cell Cull │  2,736│   152│
├──────────────────┼───────┼──────┤
│After 4-cell Cull │  1,159│   178│
├──────────────────┼───────┼──────┤
│After 5-cell Cull │    371│   119│
├──────────────────┼───────┼──────┤
│After 6-cell Cull │     87│    42│
├──────────────────┼───────┼──────┤
│After 7-cell Cull │     16│    10│
├──────────────────┼───────┼──────┤
│After 8-cell Cull │      2│     1│
├──────────────────┼───────┼──────┤
│All Done          │      0│     0│
└──────────────────┴───────┴──────┘

Does mwords Make Much of a Difference?

As an experiment, I decided to write a version, f10, that does not used transposed word matrix mwords (it still does the words and stubs culling). I compared it to my original version,f0, and the fastest submitted version, f1:

      0 1 10 time 'b4'
  f0  b4 → 1.4E¯2 |     0% ⎕⎕                                       
  f1  b4 → 2.2E¯1 | +1551% ⎕⎕⎕⎕⎕⎕⎕⎕⎕⎕⎕⎕⎕⎕⎕⎕⎕⎕⎕⎕⎕⎕⎕⎕⎕⎕⎕⎕⎕⎕⎕⎕⎕⎕⎕⎕⎕⎕⎕⎕
  f10 b4 → 2.1E¯1 | +1422% ⎕⎕⎕⎕⎕⎕⎕⎕⎕⎕⎕⎕⎕⎕⎕⎕⎕⎕⎕⎕⎕⎕⎕⎕⎕⎕⎕⎕⎕⎕⎕⎕⎕⎕⎕⎕⎕ 

Interestingly, f10 performed remarkably close to f1. When I looked at the code for f1, I saw that the author had implemented a similar culling approach and had commented in several places that the construct was to improve performance. Good job! But this does demonstrate that maintaining a parallel, simple, copy of words makes the solution run about 15× faster.

Takeaways

There are a couple of other optimizations I could have implemented:

  • In the setup, I could have filtered out all words that were longer than ≢∊board.
  • If this FindWords was used a lot, and I could be fairly certain that words was static (unchanging), then I could create mwords outside of FindWords. The line that creates mwords consumes about half of total time of the function.

When thinking about performance and optimization:

  • Unless there’s an overwhelming reason to do so – don’t sacrifice code clarity for performance. If you implement non-obvious performance improvements, note them in comments or documentation.
  • Optimize effectively – infinitely speeding up a piece of code that contributes 1% to an application’s CPU consumption makes no real impact.
  • Consider how your data is structured and how that might affect performance. In this case, representing words as a vector of words is convenient, readable, and there aren’t those extra spaces that might occur in a matrix format. But as we saw, it performs poorly compared to a simple matrix format. Don’t be afraid to make the data conform to a more performant organization.
  • Along similar lines, consider how simple arrays are stored in contiguous memory and whether you can take advantage of that.

In case you were wondering, the two solutions Rich Park looked at in his webinar were f4 and f7 in the timings above. The fastest submission, f1, was submitted by Julian Witte. Please remember that we did not specify performance as a criterion for the problem, so this is in no way a criticism of any of the submissions.

If you’re curious to look at the code for the submissions, this .zip file includes namespaces f0f9, each of which contains a FindWords function and any needed subordinate functions (in addition to the solution namespaces, the .zip file also includes AllWords, the time function and 4 sample boards – b2,b3,b4, and b6). You can extract and use the code as follows:

  1. Unzip Submissions.zip to a directory of your choosing.
  2. In your APL session, enter:
    ]Link.Import # {the directory you chose}/Submissions
    This step might take several seconds when Link.Import brings in AllWords

You can then examine the code, run your own timings, and so on. One interesting thing to explore is which submissions properly handle 1×1 and 0×0 boards.

Postscript

When I started to write the explanation of my code, it occurred to me: “This is 2026 and we have LLMs that might be able to explain the code. Let’s give them a try…”

So, I asked each of Anthropic’s Claude Opus 4.6 Extended, Google’s Gemini Pro, and Microsoft’s Copilot Think Deeper the following:

Explain the attached code. Note that a cell in board can have multiple letters like “qu” or “ough”. Also note that the words list is the official scrabble words list and has no single letter words.

The results were interesting and, in several places, a more concise and coherent explanation than I might produce. But how accurate and useful were their explanations? Stay tuned for a blog post about how well different LLMs explain APL code!

Outperforming Nested Arrays with Classic APL Techniques – Part 1

Let me take you back to the 1970s. We’re playing Space Invaders in the arcade, watching Star Wars in the cinema, and listening to David Bowie in our Minis. When we come home and open our terminals to use APL, all of our arrays are flat. Nested arrays will not be part of a commercial APL implementation until NARS is released in 1981. Performing computations on, say, a list of names, is not as straightforward as we might hope!

We might choose to keep each name in a row of a matrix. For example:

      M←4 7⍴'Alice  Bob    CharlieBen    '
      M
Alice
Bob
Charlie
Ben

Alternatively, we might choose to delimit each name with a ';' (or another suitable delimiter). For example:

      V←';Alice;Bob;Charlie;Ben'

If we want to count the number of names beginning with a 'B', we can’t simply call +/'B'=⊃¨names, but have to think about our representation:

      +/'B'=M[;⎕IO]
2
      +/'B'=(¯1⌽V=';')/V
2

We don’t know it yet, but 50 years later, these types of expressions will have excellent performance on the computers of the day. They will also be the key to outperforming the nested arrays that will be introduced in the 1980s.

      ⍝ let's use bigger data
      M←10000000 7⍴M
      V←(2500000×⍴V)⍴V
      N←10000000⍴'Alice' 'Bob' 'Charlie' 'Ben'

      ⍝ see how much faster the non-nested versions are!
      ]Runtime -c "+/'B'=M[;⎕IO]" "+/'B'=(¯1⌽V=';')/V" "+/'B'=⊃¨N"

  +/'B'=M[;⎕IO]      → 4.1E¯3 |     0% ⎕                                        
  +/'B'=(¯1⌽V=';')/V → 1.2E¯2 |  +192% ⎕⎕                                       
  +/'B'=⊃¨N          → 2.8E¯1 | +6863% ⎕⎕⎕⎕⎕⎕⎕⎕⎕⎕⎕⎕⎕⎕⎕⎕⎕⎕⎕⎕⎕⎕⎕⎕⎕⎕⎕⎕⎕⎕⎕⎕⎕⎕⎕⎕⎕⎕⎕⎕

The above example is an illustrative benchmark, but it shows what’s possible.

In this blog post, I’m going to explore various techniques to leverage flat representations of nested data. I’ll look at querying and manipulating these representations, and see how the concrete array representation that Dyalog APL uses affects performance.

How Arrays are Stored

The Dyalog interpreter stores your flat arrays in memory as a header (which includes some bookkeeping information needed by the interpreter) followed by the shape of the array, and then the contents of the array in ravel order. For example, 2 3⍴⎕A looks like this:

┌─────┬─────┬─────────────┐
│ ... │ 2 3 │ A B C D E F │
└─────┴─────┴─────────────┘

Nested arrays are more complicated. Every element is stored separately, potentially at a distant location in memory. A nested array is still stored with a header and shape, but the body consists of addresses of the array’s elements, rather than the elements themselves. These addresses tell the interpreter where in the workspace to find each element of the nested array. This means that the array 'ABC' 'DEF' looks like this:

            ┌──────────┐
            │          ↓
┌─────┬───┬─│───┐     ┌─────┬───┬───────┐     ┌─────┬───┬───────┐
│ ... │ 2 │ * * │ ... │ ... │ 3 │ A B C │ ... │ ... │ 3 │ D E F │
└─────┴───┴───│─┘     └─────┴───┴───────┘     └─────┴───┴───────┘
              │                                ↑
              └────────────────────────────────┘

Sometimes, the interpreter can detect that you’re reusing an array for multiple elements, and refer to it multiple times, rather than copying. For example, 4⍴⊂'ABC' is stored as:

            ┌─┬─┬─┬────────┐
            │ │ │ │        ↓
┌─────┬───┬─│─│─│─│─┐     ┌─────┬───┬───────┐
│ ... │ 4 │ * * * * │ ... │ ... │ 3 │ A B C │
└─────┴───┴─────────┘     └─────┴───┴───────┘

This layout has a few consequences for us:

  • Nested arrays need to store extra information for each of their elements – the header and the shape. Although this is partially mitigated by the trick above, this space requirement quickly grows if you have many nested elements!
  • Accessing the elements of nested arrays can be slow. Modern hardware is optimised under the assumption that you won’t start doing work far away from where you are already working. However, when you access an element of a nested array, that element could be stored very far away in the workspace, so your computer could take a while to load it.

When looking at the performance of algorithms involving arrays, doing as much as possible to reduce nesting will often yield good results.

Partitioned Vectors

Although I looked at using matrices in the previous section, I’m going to focus on using partitioned vectors from now on. Using matrices mostly involves multiple references to the rank operator (), while using a partitioned vector is much more interesting.

There are many ways to represent the partitioning of a vector into multiple sub-vectors. I’ve already shown one way – delimiting the sub-vectors with a character that does not itself appear in any sub-vector:

      V←';Alice;Bob;Charlie;Ben'

Here, a delimiter precedes the content of each sub-vector. This is very useful; if I need to know the delimiter, I can find it with ⊃V. I could also place the delimiter after each sub-vector, making it easy to convert between these representations with a rotate:

      1⌽V
Alice;Bob;Charlie;Ben;

This is the format you get from reading a file with ⎕NGET 'filename' 1, with linefeed characters (⎕UCS 10) replacing semicolons as the trailing delimiters.

You can also store the partitions in a separate array from the sub-vectors. For example, you could use a Boolean mask to indicate the start of each sub-vector:

      data←'AliceBobCharlieBen'
      parts←1 0 0 0 0 1 0 0 1 0 0 0 0 0 0 1 0 0
      [data ⋄ parts]
A l i c e B o b C h a r l i e B e n
1 0 0 0 0 1 0 0 1 0 0 0 0 0 0 1 0 0

Note: this example uses array notation, a new feature available in Dyalog v20.0. Using array notation, [a ⋄ b ⋄ c] defines an array with a, b, and c as major cells. This is convenient when viewing vectors whose contents align.

One benefit of this format is that you can include any character in a sub-vector without worrying about cutting it in half by including a delimiter. I will return to this way of representing partitions later, but it’s not the only option. For an in-depth exploration, see this essay on the APL Wiki.

Partitioned Searching

Before I continue, I want to examine some timings, so I need some large, random data to work with. I’m going to use the list of English words used for spell-checking on my machine. I’ll use ⎕C to case-fold each word so that I can ignore case. This list is ordered alphabetically, but I’m not going to take advantage of that here.

      N←⎕C¨⊃⎕NGET'words.txt'1  ⍝ load the words as a nested vector
      ⍴N                       ⍝ how many are there
479823
      V←∊';',¨N                ⍝ delimited vector to work with
      100↑V                    ⍝ what does it look like
;1080;10-point;10th;11-point;12-point;16-point;18-point;1st;2;20-point;2,4,5

You can also use ⎕NGET to load the words into a flat array directly, which is significantly faster.

      ]Runtime -c "∊';',¨⊃⎕NGET'words.txt'1" "';'@{⍵=⎕UCS 10}¯1⌽⊃⎕NGET'words.txt'"
                                                                                               
  ∊';',¨⊃⎕NGET'words.txt'1            → 5.3E¯2 |   0% ⎕⎕⎕⎕⎕⎕⎕⎕⎕⎕⎕⎕⎕⎕⎕⎕⎕⎕⎕⎕⎕⎕⎕⎕⎕⎕⎕⎕⎕⎕⎕⎕⎕⎕⎕⎕⎕⎕⎕⎕ 
  ';'@{⍵=⎕UCS 10}¯1⌽⊃⎕NGET'words.txt' → 2.8E¯2 | -48% ⎕⎕⎕⎕⎕⎕⎕⎕⎕⎕⎕⎕⎕⎕⎕⎕⎕⎕⎕⎕⎕   

Text is not the only type of data that you might want to store efficiently; for example, you might need to store DNA strings or numeric vectors. However, I’m going to use text in this example.

I’ve already demonstrated a very basic example of searching a partitioned vector for a pattern – I counted the number of names beginning with 'B'. Let’s investigate how that really worked. I’ll start by finding a mask of the delimiter preceding each word:

      m←V=';'
      20(↑⍤1)[V ⋄ m]
; 1 0 8 0 ; 1 0 - p o i n t ; 1 0 t h ;
1 0 0 0 0 1 0 0 0 0 0 0 0 0 1 0 0 0 0 1

If I rotate this mask to the right by one place, it now corresponds to the first letter of each word:

      20(↑⍤1)[V ⋄ ¯1⌽m]
; 1 0 8 0 ; 1 0 - p o i n t ; 1 0 t h ;
0 1 0 0 0 0 1 0 0 0 0 0 0 0 0 1 0 0 0 0

I can use this rotated mask to pick out the first character of each word; it then becomes easy to count the words beginning with 'b' (not 'B' anymore, as I case-folded the words):

      50↑(¯1⌽m)/V     ⍝ first character of each of the first 50 words
111111112222223333334444455566778899-aaaaaaaaaaaaa
      +/'b'=(¯1⌽m)/V  ⍝ number of words that start with a 'b'
25192
      +/'b'=⊃¨N       ⍝ double check answer against nested
25192

Now for something more complicated. Say I want to count the number of words beginning with the prefix 'con'. I could reuse the previous technique to find the first character of each word, and tweak it to find the second and third characters as well:

      ⍝ ┌─ starts c ─┐ ┌── then o ──┐ ┌── then n ──┐
      +/('c'=(¯1⌽m)/V)∧('o'=(¯2⌽m)/V)∧('n'=(¯3⌽m)/V)
3440

I need to be careful here! Some words in the list are shorter than 3 letters, so when I rotate the mask, I start picking from the following word. Fortunately, I’ve included the delimiters, so when I cross a word-boundary, one of the tests will evaluate to false. If I stored a partition representation separately to the data, I would need to handle this case.

There’s a nice way to use find () to solve this problem. As the start of a word is explicitly encoded by a ';' in our data, I can search directly for the start of a word followed by 'con'.

      +/';con'⍷V
3440

Both of these methods are much faster than acting on the nested data:

      ]Runtime -c "+/{'con'≡3↑⍵}¨N" "+/('c'=(¯1⌽m)/V)∧('o'=(¯2⌽m)/V)∧('n'=(¯3⌽m)/V)⊣m←V=';'" "+/';con'⍷V"

  +/{'con'≡3↑⍵}¨N                                        → 4.3E¯2 |   0% ⎕⎕⎕⎕⎕⎕⎕⎕⎕⎕⎕⎕⎕⎕⎕⎕⎕⎕⎕⎕⎕⎕⎕⎕⎕⎕⎕⎕⎕⎕⎕⎕⎕⎕⎕⎕⎕⎕⎕⎕ 
  +/('c'=(¯1⌽m)/V)∧('o'=(¯2⌽m)/V)∧('n'=(¯3⌽m)/V)⊣m←V=';' → 2.5E¯3 | -95% ⎕⎕                                       
  +/';con'⍷V                                             → 3.3E¯3 | -93% ⎕⎕⎕

Great, I can count things at the start of words… but things get really interesting when I want to count things occurring anywhere in a word, as I need to get creative with using delimiters as anchors.

Say I want to count the number of words which contain the letter 'a'. I can get a mask of all the occurrences of it, but as a word can contain more than one 'a', I have to be clever about counting. I’ll select some test data to see what’s going on:

      test←';abc;xyz;banana'

There are several ways to count the words here that countain an 'a'. The first is to use a scan of the occurrences of a delimiter to give a unique identifier for each word. I can then use the occurrences of 'a' to select these IDs. The number of words that contain an 'a' is then the number of unique IDs:

      [
            test        ⍝ data
            test=';'    ⍝ mask of delimiters
            +\test=';'  ⍝ word IDs
            test='a'    ⍝ mask of 'a's
      ]
; a b c ; x y z ; b a n a n a
1 0 0 0 1 0 0 0 1 0 0 0 0 0 0
1 1 1 1 2 2 2 2 3 3 3 3 3 3 3
0 1 0 0 0 0 0 0 0 0 1 0 1 0 1
      (test='a')/+\test=';'    ⍝ word IDs of each 'a' (one in 'abc', three in 'banana')
1 3 3 3
      ≢∪(test='a')/+\test=';'  ⍝ number of unique IDs
2

Note: this example again uses array notation, a new feature available in Dyalog v20.0. Line breaks can be used in place of s in array notation; I have used this option here to evaluate each row of a matrix on its own line.

I want to check that this also works on large input:

      ⍝ try it on the large input
      ≢∪(V='a')/+\V=';'
281193
      ⍝ double-check against the nested format
      +/∨/¨N='a'
281193
      ⍝ and it's faster
      ]Runtime -c "+/∨/¨N='a'" "≢∪(V='a')/+\V=';'"
                                                                             
  +/∨/¨N='a'        → 5.2E¯2 |   0% ⎕⎕⎕⎕⎕⎕⎕⎕⎕⎕⎕⎕⎕⎕⎕⎕⎕⎕⎕⎕⎕⎕⎕⎕⎕⎕⎕⎕⎕⎕⎕⎕⎕⎕⎕⎕⎕⎕⎕⎕ 
  ≢∪(V='a')/+\V=';' → 4.6E¯3 | -91% ⎕⎕⎕⎕

That’s one way to solve this problem, but there are many more and I’m sure the interested reader will come up with their own. Here are a few alternatives for inspiration:

      ≢∪(V=';')⍸⍥⍸V='a'
281193
      +/';a'⍷V∩'a;'
281193
      +/1≠¯2-/(⍸,⎕IO+≢)';'=V∩'a;'
281193
      +/2</0,(1⌽V=';')/+\V='a'
281193
      (V=';'){+/(⍺/⍵)≥a/1⌽a←⍺/⍨⍵∨⍺}V='a'
281193

I’m going to have a closer look at how the last two of these work in part 2 of this post. For now, I’ll move beyond counting and do some structural manipulation with this format.

Partitioned Manipulation

Filtering

Some manipulations on the delimited format are as easy as they would be with the nested format. Say you’re interested in the distribution of vowels among words (a, e, i, o, and u in English). You might then want to pare down your list of words to include only the vowels. With our delimited format, this is simple:

      test←';the;quick;brown;fox;jumps;over;the;lazy;dog'
      (test∊';aeiou')/test  ⍝ one way
;e;ui;o;o;u;oe;e;a;o
      test∩';aeiou'         ⍝ another way
;e;ui;o;o;u;oe;e;a;o

Besides remembering to preserve the delimiter, there’s nothing tricky going on here. Don’t get too comfortable though, things are about to get trickier!

So that I can continue to check my answers against the nested representation, I will define a utility function to split a delimited vector into a nested representation:

      Split←{1↓¨(⍵=';')⊂⍵}
      Split test 
┌───┬─────┬─────┬───┬─────┬────┬───┬────┬───┐
│the│quick│brown│fox│jumps│over│the│lazy│dog│
└───┴─────┴─────┴───┴─────┴────┴───┴────┴───┘

I can now test filtering against the nested representation:

      (Split V∩';aeiou')≡(N∩¨⊂'aeiou')
1

You can also write Split as {(⍵≠';')⊆⍵}, but this fails on some edge cases. Can you see which ones?

As well as filtering the letters of a word, I might want to filter words out of the whole list. I could do this filter on any condition; for now, I’ll use a condition that I know how to compute already and filter for words that begin with 'con'. Once I have identified the places in the delimited vector that indicate words beginning with 'con', I can find the word ID for each of those places, and use those IDs to construct a mask to filter the data:

      test←';banana;cons;conman;apple;convey'
      ids←+\test=';'                  ⍝ word IDs
      (';con'⍷test)/ids               ⍝ IDs of words that start with 'con'
2 3 5
      m←ids∊(';con'⍷test)/ids         ⍝ mask of words that start with 'con'
      [test ⋄ ';con'⍷test ⋄ ids ⋄ m]  ⍝ see how those line up
; b a n a n a ; c o n s ; c o n m a n ; a p p l e ; c o n v e y
0 0 0 0 0 0 0 1 0 0 0 0 1 0 0 0 0 0 0 0 0 0 0 0 0 1 0 0 0 0 0 0
1 1 1 1 1 1 1 2 2 2 2 2 3 3 3 3 3 3 3 4 4 4 4 4 4 5 5 5 5 5 5 5
0 0 0 0 0 0 0 1 1 1 1 1 1 1 1 1 1 1 1 0 0 0 0 0 0 1 1 1 1 1 1 1
      m/test  ⍝ only words that start with 'con'
;cons;conman;convey

I’ll try it on the big data and compare the result to the nested version:

      answer←V/⍨ids∊(';con'⍷V)/ids←+\V=';'
      (Split answer)≡{'con'≡3↑⍵}¨⍛/N
1

Note: this example uses the behind operator (), a new feature available in Dyalog v20.0.

This method seems to work perfectly, but what is the performance like?

      ]Runtime -c "{'con'≡3↑⍵}¨⍛/N" "V/⍨ids∊(';con'⍷V)/ids←+\V=';'"
                                                                                         
  {'con'≡3↑⍵}¨⍛/N               → 3.8E¯2 |   0% ⎕⎕⎕⎕⎕⎕⎕⎕⎕⎕⎕⎕⎕⎕⎕⎕⎕⎕⎕⎕⎕⎕⎕⎕⎕⎕⎕⎕⎕⎕⎕⎕⎕⎕⎕⎕⎕⎕⎕⎕ 
* V/⍨ids∊(';con'⍷V)/ids←+\V=';' → 1.1E¯2 | -73% ⎕⎕⎕⎕⎕⎕⎕⎕⎕⎕⎕

Note the * by the delimited version. This indicates that the result is different to the result of the nested version. However, this is to be expected; I did not include the Split in the timings, so the result formats are different. However, I know that the results match if I ignore the format, as I checked them before.

Reversing

Continuing the tour of miscellaneous things that you might like to do with a delimited vector, let’s look at reversal. With filtering, filtering the contents of each word turned out to be less complicated than filtering whole words. With reversal, the reverse (haha!) is true. The technique to reverse each word builds on the technique to reverse the order of the words.

The key will be the vector of word IDs that I’ve used before. To reverse the order of the words, I can use the grade of the word IDs directly to sort our data. This works because word IDs are increasing along the vector, so by grading the IDs down, I fetch larger IDs (later words) to the start of the result. It also relies on being stable, meaning that the order of elements with the same value (that is, letters within a word) is preserved.

      test←';first;second;third'
      ids←+\test=';'
      test[⍒ids]
;third;second;first

      ⍝ how everything lines up
      [test ⋄ ids ⋄ ⍒ids ⋄ test[⍒ids]]
 ;  f  i  r  s  t ; s e  c  o  n  d ; t h i r d
 1  1  1  1  1  1 2 2 2  2  2  2  2 3 3 3 3 3 3
14 15 16 17 18 19 7 8 9 10 11 12 13 1 2 3 4 5 6
 ;  t  h  i  r  d ; s e  c  o  n  d ; f i r s t

I can build on this to reverse the letters of each word. Notice that if I reverse this result, I get almost exactly what I need; each word is back in its original position, with its letters in the reverse order:

      ⌽test[⍒ids]
tsrif;dnoces;driht;

The only issue is that the delimiters are now trailing, rather than leading, but that’s easily fixed with a rotate:

      ¯1⌽⌽test[⍒ids]
;tsrif;dnoces;driht

As a matter of taste, I prefer to do all the manipulation on the grade vector rather than on the result:

      test[¯1⌽⌽⍒ids]
;tsrif;dnoces;driht

Isn’t that nice? When I first thought about doing real manipulations on this format, I didn’t expect the code to be so simple. For completeness, here are the usual checks and timings:

      ⍝ check the results are correct
      (⌽N)≡Split V[⍒+\V=';']
1
      (⌽¨N)≡Split V[¯1⌽⌽⍒+\V=';']
1
      ⍝ look at the runtimes
      ]Runtime -c "⌽N" "V[⍒+\V=';']"
                                                                        
  ⌽N          → 2.9E¯3 |    0% ⎕⎕⎕⎕⎕⎕⎕⎕                                 
* V[⍒+\V=';'] → 1.5E¯2 | +419% ⎕⎕⎕⎕⎕⎕⎕⎕⎕⎕⎕⎕⎕⎕⎕⎕⎕⎕⎕⎕⎕⎕⎕⎕⎕⎕⎕⎕⎕⎕⎕⎕⎕⎕⎕⎕⎕⎕⎕⎕ 
      ]Runtime -c "⌽¨N" "V[¯1⌽⌽⍒+\V=';']"
                                                                          
  ⌽¨N             → 1.7E¯2 |  0% ⎕⎕⎕⎕⎕⎕⎕⎕⎕⎕⎕⎕⎕⎕⎕⎕⎕⎕⎕⎕⎕⎕⎕⎕⎕⎕⎕⎕⎕⎕⎕⎕⎕⎕⎕⎕⎕⎕⎕⎕ 
* V[¯1⌽⌽⍒+\V=';'] → 1.8E¯2 |  0% ⎕⎕⎕⎕⎕⎕⎕⎕⎕⎕⎕⎕⎕⎕⎕⎕⎕⎕⎕⎕⎕⎕⎕⎕⎕⎕⎕⎕⎕⎕⎕⎕⎕⎕⎕⎕⎕⎕⎕⎕ 

What’s happening here? Our fancy flat techniques are supposed to give us superior performance! Well, recall how arrays are stored. To reverse a nested array, all the interpreter has to do is reverse the addresses of the nested elements – it doesn’t have to touch the contents of those elements at all:

┌─────┬───┬───────┐             ┌─────┬───┬───────┐
│ ... │ 3 │ * * * │  →becomes→  │ ... │ 3 │ * * * │
└─────┴───┴─│─│─│─┘             └─────┴───┴─│─│─│─┘
          ┌─┘ │ └─┐                         └─│─│─┐
          │   │   │                       ┌───│─┘ │
          ↓   ↓   ↓                       ↓   ↓   ↓
         ┌─┐ ┌─┐ ┌─┐                     ┌─┐ ┌─┐ ┌─┐
         │A│ │B│ │C│                     │A│ │B│ │C│
         └─┘ └─┘ └─┘                     └─┘ └─┘ └─┘

By contrast, our flat version needs to process every letter of every word. It also needs to perform a grade, which is relatively expensive.

The difference evens out when I record the time taken to reverse each word. This is likely because the nested version now has to traverse every nested element doing a reversal, while the flat version only needs to do the relatively cheap extra work of ¯1⌽⌽.

To Be Continued…

In conclusion, this flat format is not a magic bullet for performance, it really depends on exactly what you want to do with it. If you’re doing a lot of searching, then using a flat format might be what you need, but if you’re doing more manipulatating, then a nested format might be better. The only way to know is to write the code and test the performance on representative data!

I’ve covered some interesting ways to process character data in this flat format, but it doesn’t stop there! I haven’t yet touched on numeric or Boolean data at all, and that’s where things get really interesting. If we have a partitioned vector, how might we sum each sub-vector? How might we do a plus-scan on each sub-vector? Will this be faster or slower than nested equivalents? The second part of this post (coming soon!), will give the answers to these questions and more.